: : the gardener's retirement party: :

It's official.  My husband, who I call the Gardener, is retired.  He has spent his entire career working as a Park Ranger (not a gardener, but he plays one at home) and while still in his 40's, with a 4 year old, and twin 11 year olds at home...he is officially, retired.  It's something we have talked about since before we got married.  How we wanted to parent.  Being available to be with our kids and enjoy them every minute.  It has required us to make some not so fun financial decisions.  We don't have a fancy house or drive new cars or go on vacation very often.  My kids do ask why we don't have what their friends have and my answer has always been, "Would you rather have a big house?  Or would you rather have one of your parents greet you at the door EVERY single day when you get home from school?  Why yes, in fact guilt does work quite well in our house.  Because their answer is always..."to have our parents home".

And it's true.  We get to be with our kids and each other, a lot.  It's what works for us.  Life is short and my husband and I have both experienced that in our life early on.  Losing a sister.  Losing a parent.  Losing fellow officers during our law enforcement careers.  It makes you look at life with a different set of eyes.  And now that he is retired, we will be together even more.  God is good and I know He has a plan for us.  We are excited to see what comes next for our little family and what new adventures will come our way.

I wanted to share some of the ideas for putting together his party...and I have to start with the best!  Remember my BFF Kristin?  Who made THIS cake?  She did it again!  This cake had a tent on top with two word bubbles coming out.  One said "So how do you like retirement now?" and the other said, "I'd like it a lot better had we seen some deer on this hunting trip".  (the gardener is an AVID deer hunter) Outside of the tent sits a deer, roasting a marshmallow over the campfire.  The cake also has shotgun shells along the border, grass, and rocks.  Kristin is off the hook amazing with her cakes.  It was great!  All of the fondant is homemade and it is SO delicious.  Usually fondant is...ick!  Her's is made from marshmallows and mmmmmmm!

retirementpartycake2

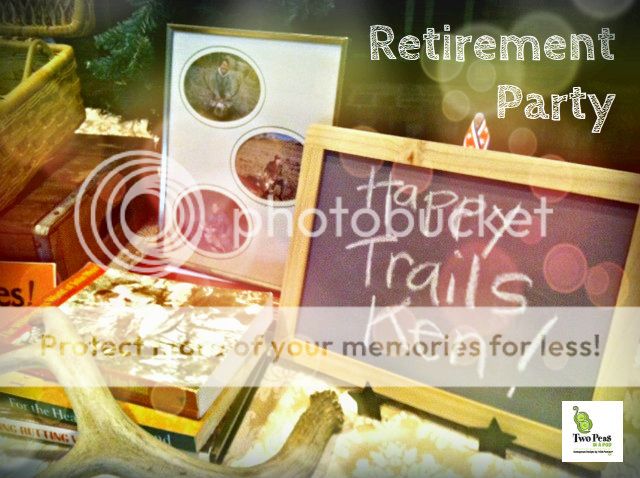
One of the focal points of the party was this table I set up with mementos.  It has a resolution that had been passed by the park board recognizing his service, a vintage hummingbird picture (his loves his hummingbirds), a stack of books about deer, John Muir and wilderness, deer antlers, a memory jar and a few other pictures and items and a place for cards.

Photobucket

retirementparty1tabletopThe memory jar asked for guests to leave Ken a memory - there were A LOT of stories to be told and this was a fun way for people to write down something that they remembered doing with Ken or experienced with him.  He really appreciated the sentiments.retirement party

We also had a "Trail Mix Bar".  Pretzels, nuts, M&M's of course and more...set out with bags that said "Thank you!  Our family thanks you for your friendship through the years and for sharing this special occasion with us tonight".  This sign above was set up to invite our friends to make a bag of trail mix snacks for their next hike.  Big hit with the kids, young and old alike!  And yes, that is the Gardener, my husband, on that horse in the mountains.  His favorite place in the world, hunting horseback in the backcountry.  (that cowboy streak in him is what made me fall hard for him...so hot.  ahem...anyway...)

retirementpartymemory

Each table was set with a wood "cookie" that his best friend had cut.  I found little ceramic birds at The Flower Factory for only $1.50 / each.  I had the jars and vases already so I added some moss inside them and also on the wood for a natural look.  To each vase, I added a little picture of my husband that says Happy Retirement and a flower.  Underneath I laid a piece of burlap layered with a Riley Blake chevron print.  Simple, inexpensive, and fit our purposes quite nicely.

retirementparty4

I got ZERO pictures of the food but it was AMAZING as always.  Fresh, tasty and gorgeous.  Our caterer, In Good Taste does a fabulous job and it took all the pressure off of me.  It was so nice to be able to enjoy the party and not worry about serving or preparing.  Love, love, love her!

So that's it.  I think we will have a family day at the pool this afternoon.  You know, since he's home on a weekend and all.  (A first!  He has worked EVERY weekend, and EVERY holiday, YES including CHRISTMAS, our entire marriage.)  We are going to go enjoy our time together.  Happy Retirement indeed!

: : Two-fer two peas e-course giveaway : :

I'm giving away a free seat in BOTH my sewing e-courses.  Join me on-line to sew two great projects.  Simply leave me a comment here about what other courses you would like to see me offer from my pattern line and I will draw a winner who will receive ONE free registration to both e-courses.  Read on...

Last year, my cousin Andrew and I put together my first e-course, the Tie Tote.  It's been super popular and the paper pattern for the bag followed this Spring.  And now, a crowd pleaser - the Hazel Hipster, is the next in our e-course series.

Both courses offer you a 3 video series that provides an hour or more of instruction broken up into manageable parts.  You get supporting text to go along with it on the project page.  I share my tips for putting the bags together and using:

  • magnetic snaps
  • fusible interfacing
  • topstitching
  • gathering stitch to create a ruffle
  • and more!

With all the hard work that Andrew and I have poured into these e-courses - we would love to have you try them out and spread the word.  They are a great value.  The e-course is $20 / class.  It's like you are there with me on my back porch and I'd love for you to join me!

What happens after you purchase the course?  You will then receive a password so that you can access the class content.  (The course will not be LIVE until August 1st – pre-orders will be accepted, you will receive an email confirmation of your purchase and your access will be sent to you August 1st.)

(Here's a secret...if you are on our newsletter mailing list - a special coupon code AND and early access pass was made available.  Over there on the right - you can sign up too for the next special bargain)

If you purchase the Hazel Hipster AND the Tie Tote course, order both at the same time and we will give you a 15% discount when you purchase both classes at the same time.  (Sorry, does not apply to for previous purchases – only same day purchase of both courses).

Gets even better…if you purchase either course, you can now also get the associated paper pattern (the Fit to be Tied Tote or the Hazel Hipster) as a companion for $8.99.  Just put a note as you check out via Paypal that you would like to add a paper pattern to your order and we will invoice you and send it right out.

And this week...I'm giving away a Two-fer deal.

Simply leave me a comment here about what other courses you would like to see me offer from my pattern line and I will draw a winner who will receive ONE free registration to both e-courses.

Want extra entries?  I'd love if you'd like our Facebook page.  Leave 1 comment telling us you've done so.  Share this post about our e-course giveaway on Twitter and tag me - I'm @trishpreston.  Leave 1 comment telling us you've done so.  That's 3.   Andrew and I sure do appreciate your support, love, and excitement about the patterns and classes.

Here's the fine print : this giveaway will be open until midnight EST, Saturday July 28th.  I'll announce a winner on the 29th - using random.org to pick one of you to get the Two-fer two peas e-course giveaway.

Can't wait to register ?  You'll find our course registrations there in the right side bar.  Excited to sew with you on the back porch! Thank you, thank you, thank you for being wonderful you.  Passionate about sewing as much as me!


: : hazel hipster - the e-course : :

My most popular sewing pattern is now and e-course!  You can come sew this bag right along with me on my backporch. Ok, not literally, but pretty darn close.  This e-course is a series of 3 videos you can watch from the comfort of your home, anytime.  The course is roughly 1 hour long - broken into 3 easy segments.
The version we are making via this e-course looks like this:hazel

I will walk you through every step of the way:

  • How to prepare your materials, cutting and how to use fusible interfacing
  • I'll talk about what my favorite interfacing is for bags...
  • We will do a patchwork style strap for this crossbody bag that you will love
  • We will create a ruffle using a gathering stitch
  • Make divided slip pockets
  • Learn how to insert a magnetic snap

The class is made up of 3 videos that will take you through the various steps.  You can watch them all at once or on separate days.  I will have text information up as well to help you along and we can chat in the comment section if you'd like or send me an email.

Stacie says, “Let me just start by saying I absolutely loved the online video course!!!! I’m a visual learner so seeing you on the screen while sewing made this the perfect way for me to take a class. And the fact you can go back and forth on the video was so helpful! I think this is such a great idea!   I thought the video was great and the instructions were very clear. You explained things in detail which is always very helpful!”

And from Kristen at K-D Quilts - check out her review HERE.

The course costs $20 and you can see over there to the right, you can make your purchase from the front page here.

For instant access - purchase via etsy HERE.

I know you'll love the Hazel Hipster as much as I do and all of my friends!  Karen from Shabby Ever After had this to say about our e-course:

I was so excited to be able to participate in this video tutorial ( or should I say e-course) … I do a lot of sewing (check out my fb page ShabbyEverAfter) and even though I've made a few little kiddies bags, I have never attempted to make an adult bag ... and rarely get the chance to make anything for myself!  So with great excitement I went out to the fabric store to select fabrics for ME!  It was great to know exactly what interfacing to use as well, had it been left to me I definitely would have been standing there forever trying to decide which one.
I loved the video introductions, the Two Peas Studio looks so idyllic and loved the beautiful music used too.  I found all the instructions really easy to follow and it was so good to actually see what Trish was doing step by step instead of trying to work it out from written instructions, it was also great to be able to pause and go back over the video really easily as well instead of trying to work out which step I was on from a piece of paper.  There were so many great little tips that you might not get in written instructions (or you might ignore!) that really makes all the difference to the finished bag.
I was also so pleased that Trish made my first attempt at inserting a magnetic snap so easy and successful … I had always been nervous to do this before but it really was easy peasy!!
I had a few interruptions so didn't complete my bag in one sitting but it really didn't take long.  I was so pleased with the finished result and am planning to make another one pretty soon.   This really is a great bag … my daughter has her eyes on it already I think!

Registrations are open!  See you on the back porch!

: : by mary : :

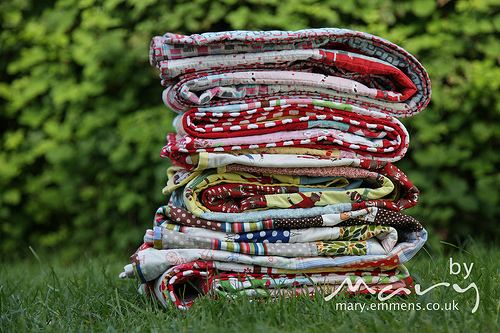
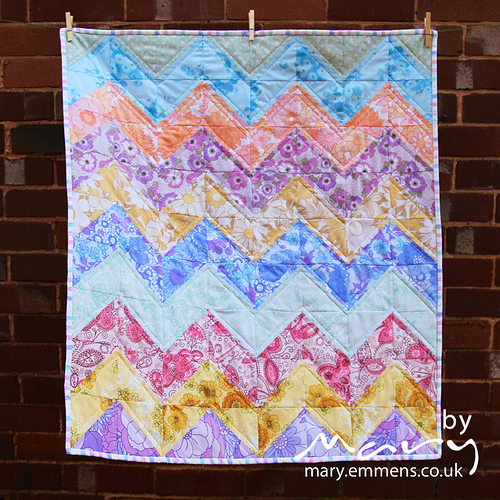
I can't honestly say when Mary and I "met" online because I'm pretty sure...it's been years ago.  Mary Emmens is from Exeter in the UK and another one of the wonderful sewists who have been reviewing patterns for me this summer.  She is a busy Mom with an etsy shop - selling her wares both online and locally at various events in the UK.  That amazing chevron quilt up there...she has made that using vintage sheets and has a kit available in her store.  Isn't it absolutely gorgeous?!  I'd love one king size for my own bed!

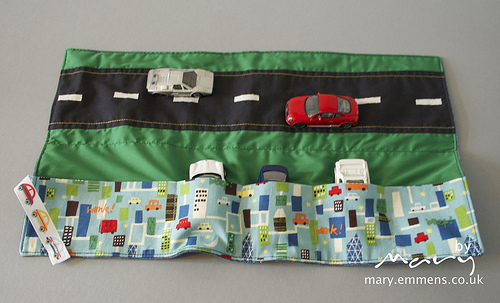
Her blog is full of fabulous photographs of her creations which also includes, now and then, baked goods.  Mmmm!  But I love looking at her photos...so colorful, fun and inspiring.  Such a joy to read.  Fun to see what others sew for their families...love this little on the go car play station!

Mary chose to review my Hazel Hipster pattern, my all time most popular pattern (I even have a NEW e-class for the Hazel coming out VERY soon!).  She made an adorable version that you'll just have to see for yourself!  I love that she made the addition of making an adjustable strap for her daughter to get longer wear out of the bag.  Mary also has a giveaway going on for some Two Peas patterns until Wednesday and until Sunday...you can hop in on a giveaway she is offering on that chevron quilt kit up top!

I know you'll enjoy Mary's blog as much as I do...and will enjoy her creations.  Thanks so much Mary for being a part of our summer review team!

:: geeky and sassy ::

I've been a follower of Virginia's for awhile now.  She never fails to inspire me in my faith and lift me up.  She's been through a lot.  A lot recently and I know that God uses people to inspire us and encourage us.  Even when bad things happen, there can be beauty blooming.  And that's Virginia.  Beauty blooming. She writes at Geeky + Sassy.  One you will want to add to your reader - it's a wonderful read.  She sews beautiful things too.  A gift she started to hone when she was just 5 years old.

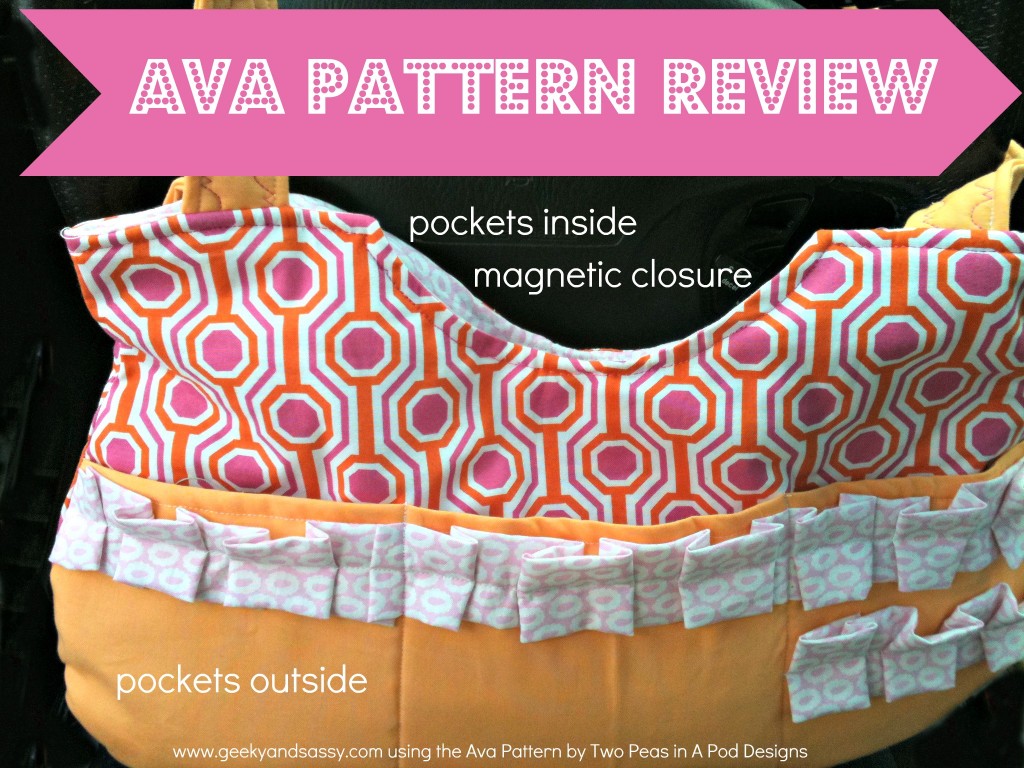
I was so pleased she answered the call when I asked for pattern reviewers this summer.  Virginia choose the Ava pattern and I love how she made it her own.  Read more about Virginia, her Ava pattern review and jump in for the giveaway she is offering of Two Peas sewing patterns so you can sew one up for yourself.

Thanks Virginia - sending hugs and many blessings for your family.  You are perfect in every way.

:: my brown bag studio ::

This is Kimberly of My Brown Bag Studio.

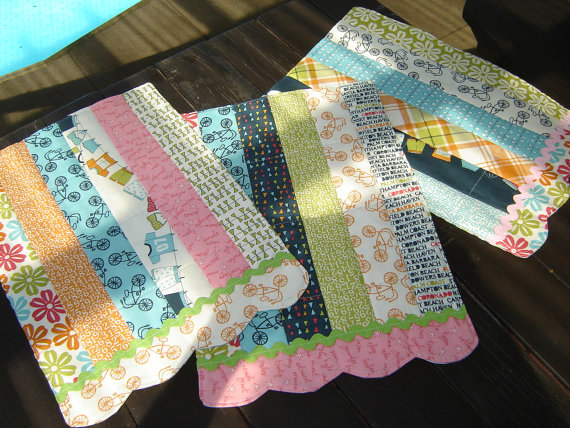
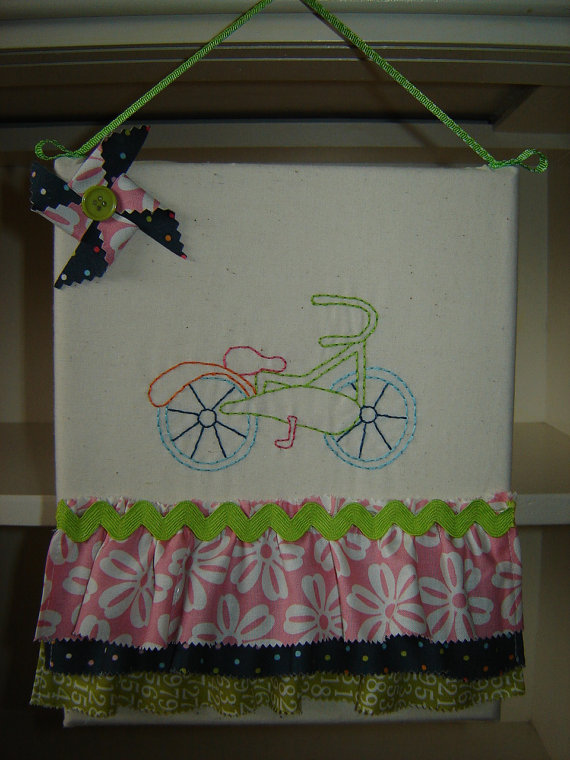
Kimberly is a very talented quilter and sewists from British Columbia, Canada.  She sells her wares around town at various art venues as well as in her etsy shop.  She blogs about her sewing, cooking, travels and more and I have no doubt you will enjoy her bright modern and beautifully constructed projects.  These are a few of my favorites in her shop - beautiful pieced placemat set and a hand stitched bike wall hanging.

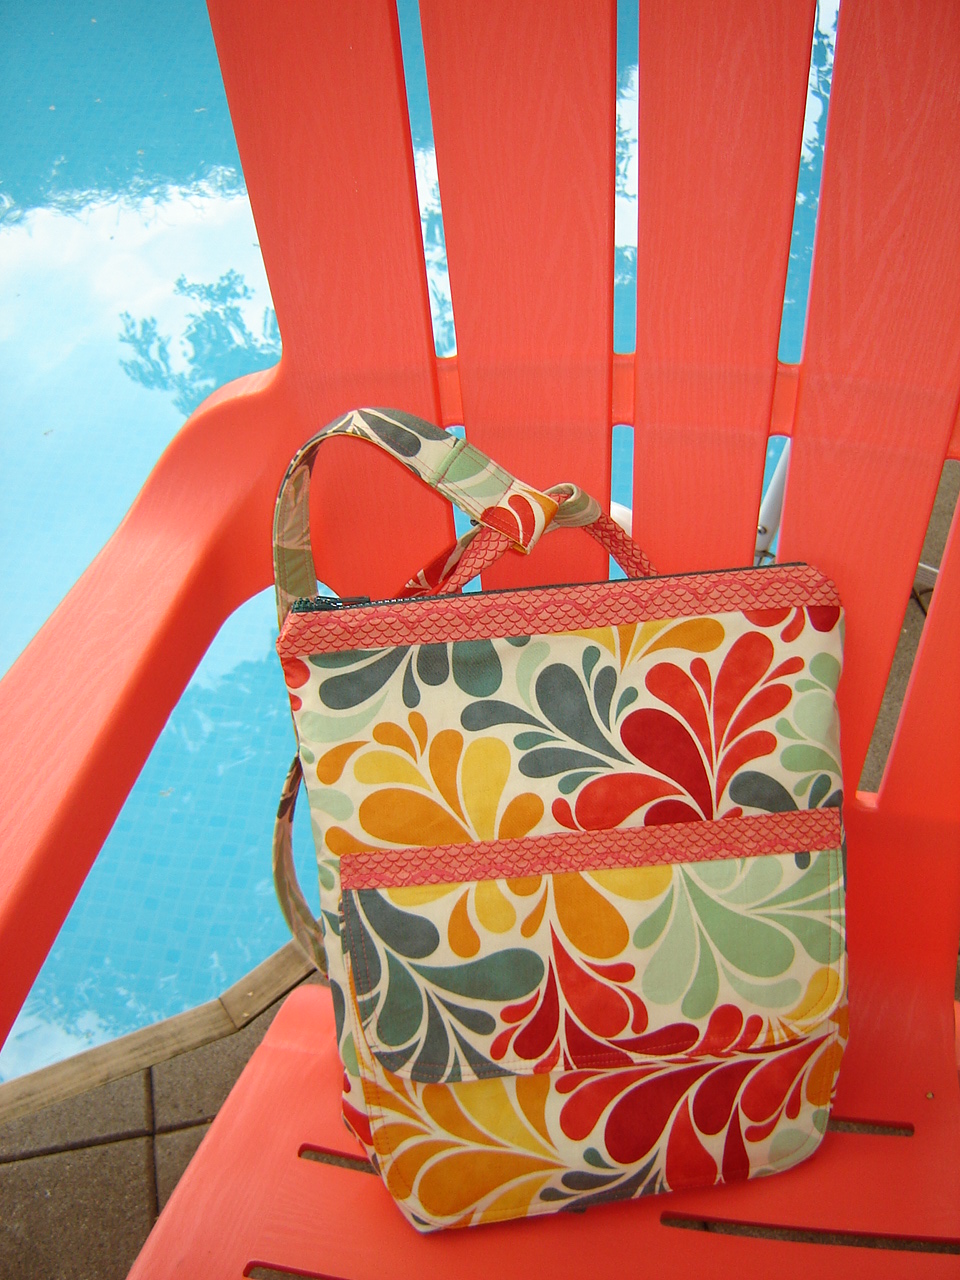
When I asked for pattern reviewers for this summer, I was very pleased that Kimberly took the challenge.  Reviewers could pick any of my current print patterns and she choose the St. Mary Backpack.  Such great summer colors she choose for her project and she's already putting it to good use!  You'll have to read more about HERE.  Thanks so much Kimberly for being a Two Peas in a Pod Summer Sewing design review team member!

Kimberly is hosting a Two Peas giveaway on her blog right now...if you'd like to be entered to win 2 surprise 2 pack combo...go visit with Kimberly at The Brown Bag Studio blog.


: : summer sewing : :


About a month ago, I "tweeted" that I was looking for sewing bloggers who would be interested in stitching up and reviewing one of my patterns, their choice.  I am so blessed that I had some amazing bloggers take up the challenge.

Their blogs are so much more than just sewing.  They share their creations, their family stories and more and I know that you will really enjoy reading each of their blogs as much as I have.

In the coming week or so, I'll be introducing you to each one.  You can also find links to their blogs and their Two Peas pattern reviews over there in the sidebar as we update the posts.

You'll meet Mary and Virginia and Selina and Kimberly and Stacy.

Yep, real soon.


: : good crafternoon : :

Summer time has led to a lot of crafternoons around our house.  Whatever Mom happens to be dabbling in, the Two Peas and Sprout undoubtedly want to get in the middle of and I'm glad, usually, to let them explore.

Our 2nd pea choose art as one of her 4H projects this summer so we have been sampling different ideas.  She finally decided she liked this mixed media painting best and had lots of fun trying out different pictures and methods.  Here's our crafternoon share with you (in a few weeks - we will open this up as a linky party so get your ideas brewing and ready to share!)

::Gather your Supplies::

  • Craft paint {acrylic craft paint you can find most anywhere.  Our Meijer store carries, so does JoAnn's fabrics or other craft stores}

  • Paint brushes

  • Paint Palette {or you could use a plastic plate / bowl.  I like the plastic because these paints wash right off, even after they dry, you can peel the paint right off of the plastic palette.  These little trays pictured here can be found at JoAnn's}

  • Paint pen {a paint pen will allow you to accent over the top of your painting with more detail after it dries.  You could also use a Sharpie marker}

  • Canvas {we found these 5x7 canvases in a 3 pack for under $5 at JoAnn's and the larger size canvases were also on sale.  3 for $9}

  • Paper with text {we have several old books that we picked out of our neighbors garbage.  yes.  They were throwing books away that had gotten wet.  They work great for our crafting.  You could use magazines, newspaper, etc.}

  • Mod Podge

  1. First, prepare your paper strips by tearing into interesting strips or shapes.  Prepare enough to cover your entire canvas.
  2. Cover your canvas generously with the Mod Podge.
  3. Place your paper all over your canvas, completely covering your surface.
  4. Paint Mod Podge over the top of your paper and let dry completely.
  5. Next, choose one of your paint colors as a background color.  Add some water to the paint a little at a time until it is runny.  Using a large brush, cover your canvas entirely with this background color.  It should be like a water color and very thin and translucent.

Finally, paint your canvas.  Fill it with some flowers, butterflies, something abstract.  Be creative.  I have my kids look through magazines and find images they like and then sketch out their ideas first.  Make suggestions to them about how to create different objects.  Add to your painting 3D objects like string or buttons, bottlecaps, feathers or fabric.  Once it's all dry, you can use your paint pen to add more fine details to your picture.

The kids had so much fun with this project and have asked to repeat it several times.  It's pretty darn fun for big kids, ahem, adults, too.

Happy Crafternoon!


Tip Junkie handmade projects

: : sunday lunch : :

You know how they say whatever you eat while you are pregnant, your baby will love?  I ate a TON of spaghetti while I was pregnant with my twins.  I pretty much ate spaghetti everyday.  When I went into labor, I requested my husband make me a huge spaghetti dinner before we went to the hospital because I knew they wouldn't let me after we arrived.  It was so good.  And now, my twins adore, crave, request spaghetti at least twice a week.
Rarely do I make a homemade sauce - typically it's boiled noodles and sauce from a jar.  But when I made this Shrimp Penne Pasta dish from Pioneer Woman recently, I learned that making a simple tomato cream sauce was, well, simple.  And now, I can't stop making it!

To adapt this to our Sunday lunch after church...it takes me all of 5 minutes or less to whip up this sauce that is 1000% better than from a jar.

One 15 oz. can of tomato sauce. 3 cloves of garlic. Salt and basil to taste. Add heavy whipping cream...I eyeball it but typically I add about 1/4 - 1/2 Cup.  Yes, heavy whipping cream.  Dr. Oz says it's actually very good for you and not to worry about the calories.  I gladly listen.

Last Sunday, I also added some garden tomatoes and a few meatballs.

Cook until warm and pour over your pasta.  The twins, (our two peas) and Sprout (the singleton) LOVED it.  So easy...(but you should try that shrimp dish from Pioneer Woman - my kids also love this alot!)

Zucchini is coming out of our ears at the moment.  Our garden is bursting with loads of zucchini's!  I bet yours is too, right?  The Gardener loves to make zucchini fries for our meals...I'd tell you how to make them but he won't tell me.  They are to die for!  He cuts them into long pieces like fries, there is olive oil and parmesan involved but he does something else to it that he says is his secret ingredient and then grills them.  Mouth watering!

But when it's my turn, I use this yummy recipe from Ina.  Onions, butter, zucchini, parmesan.  The kids can not get enough of it - serve in a cute little teacup from the thrift store with your spaghetti...easy peasy Sunday lunch.  The onions and the parmesan are absolutely delicious!

Eating is one of our favorite family things to do...while we eat, we usually are talking about what we are going to eat next.  Love good food.  Good whole healthy foods.  What easy lunch ideas do you serve your family on the weekend?

: : Weekend Crafternoon - home sweet home makeover : :

This past Spring, one of my friends asked if I would help her surprise her neighbor with a little home makeover.  The Gardener and I were delighted to help.  My friends church came in tore out the carpet in the lower level revealing amazing hardwood floors that got shined up.  They painted the walls too with a bright clean white and one accent wall in a Tiffany blue that was amazing.

The stars aligned for this project.  I wish I could show you ALL of it but we were so busy working I only got a few pictures.  I can tell you this...Mostly what we learned from this project is that a little spray paint does wonders!  But you probably already knew that!

Another set of friends of ours had recently gotten married, combined households and were unloading some furniture.  We were able to snag some pieces to put into the house and give the neighbor a few new items.  Ok...maybe more than a few.  What a blessing!  The best part was we added a dining room table into the kids play room to give them a crafting / homework station that didn't exist before.

Giving furniture new life is so much fun!  One of the old desk chairs got a facelift...some new blue paint and a new seat cushion.  She looks just lovely at the neighbors new computer desk, don't you agree?  The desk was one of those dorm room laminated style desks which is like a plastic coating.  Great for a college kid but we added some plastic appropriate spray paint in white and blue.   It refreshed that old desk for a perfect spot the kids can sit to work on the computer.

By far, my favorite piece of the day was the old lamp table.  My husbands best buddy owned this lamp, big chunky wood and it had these...kind of awful... looking coasters on each corner that were adhered into the table.  As soon as I saw it, I knew exactly what I wanted to do with it.  I LOVED how it turned out and I was so excited to hear that this was the neighbors favorite part of the house makeover.  Swoon!  The bright yellow and zebra shade were perfect together.

I was given the task to redo / create new pillows for the living room.  Here are a few of my favorites.  The first one here, I used some home dec fabric from Anna Maria Horner and added felt leaves that trailed across the pillow along with a felt flower.  I sewed a bunch of buttons to the center of the flower.  Each pillow I made, I rounded the corners and also made an envelope style closure back.  (envelope style is the fastest / easiest style and since I had a stack of pillows to make...that made my job go by with ease).  Round your corners?  Yes...otherwise you end up with these dog ears that don't fill out.  Just a tiny rounding of the corner will resolve that problem.

A familiar and much loved style...a pennant banner with the added word LOVE stitched into it.  Using a disappearing ink pen, I drew the lines for my banner and the word LOVE.  I stitched using a stitch length of about 3.5 with black thread and went over each line at least twice.  I raw edge appliqued the banner flags - stitching a straight stitch just along the edge.  I made the pillow a little bit large and then using a decorative topstitch, went all along the outer edge.

This Sis Boom print paired so well with the bright red poppies.  Layering felt circles on top of one another and adding a black button center plus a line of stitching for the stem created this field of poppies on this pillow.  So bright and cheery!

We worked really hard for about 3 days on this project.  Sewing.  Painting.  Cleaning.  Moving.  Blessing a sweet family with some sunshine.  I can't wait to make a few of these pillows for my own house...maybe this "crafternoon".

Weekend Crafternoon is a new feature I'll be sharing regularly on my blog.  Sharing some fun weekend crafternoon projects to inspire you and I hope you'll join me.  I'll be opening it up as a linky list so that you can share your crafternoon projects too.

Now...I'm off to sew! (4H judging this week!  The peas STILL haven't finished their dresses!  Wish us luck this week!)


{alice in wonderland 11th birthday party for my peas}

100_7318.jpg

My two sweet peas celebrated their 11th birthday with a fun tween theme of Alice in Wonderland.  This was a great theme because it was fun and whimsical but also sophisticated enough that they felt really special with the grown up touches to the party.

I thought I'd share what all we did for our party to inspire you - it was fun to put together!  I think this party could be done for just about any age.  Plus, this gave me an excellent excuse to go thrift store shopping - bonus!  So, here's how our Alice party went...

Invitations - I found some great graphics from google and also the graphics fairy to create these postcard invitations printed front and back  (the peas are not actually named Lily and Emily - we fudged them, they like their privacy.  Tweens!)  We hand delivered each invitation with a teapot cookie that Aunt Carla made for the girls (they were AMAZING cookies - these photos from my phone don't do them justice!).  

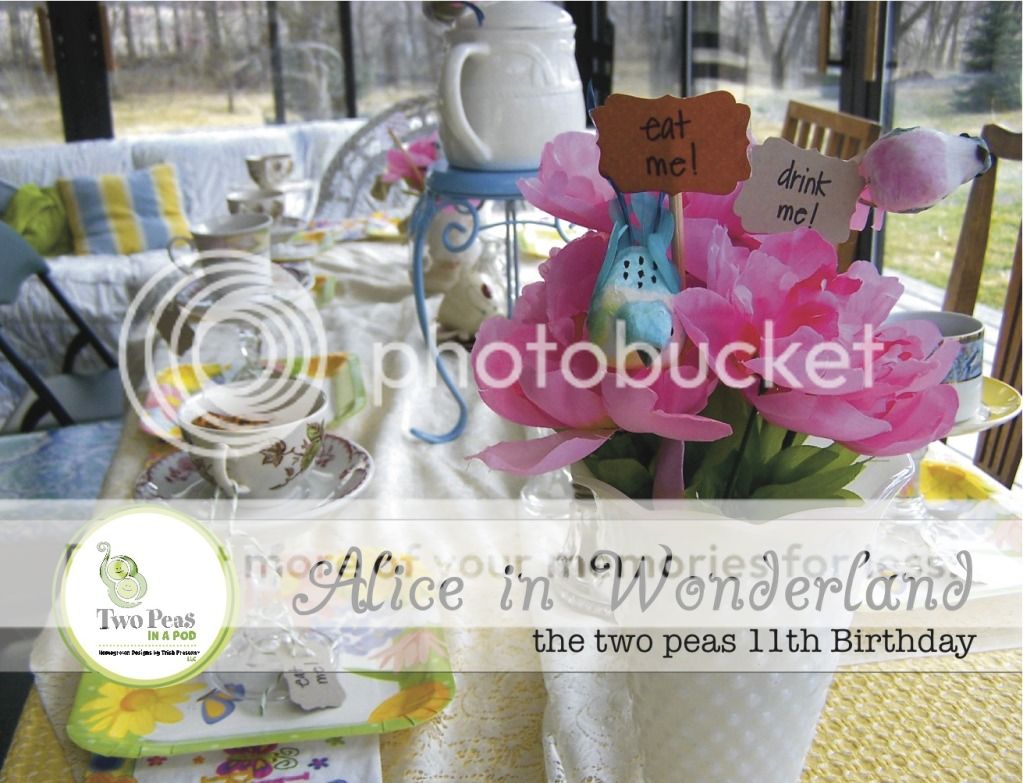
Decorations - I HAD to go to at least 5 different thrift shops to find all of the teacups and saucers.  Twist my arm.  Love junk shopping!  I scored these great Johnson Brothers china teacups at one shop and was so excited.  They match my dishes - I have  a different pattern but they are very similar!

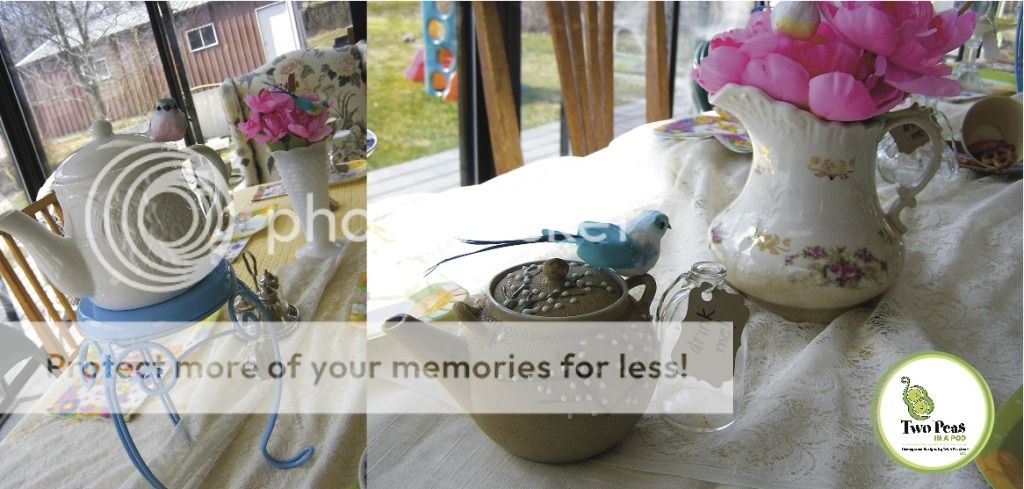
Cupcake plates!  To make the cupcake plates, use super glue or an epoxy and glue the saucers to the candlesticks.  These were used as our treat plates during the party and we also let each girl take them home as one of their favors.  They could use them to hold jewelry or a candle, etc.  Most plates were 59 cents, candlesticks 99 cents...pretty cool deal I think!  I found the teapots at the thrift store too...and added some faux flowers and birds from the dollar store.  The other decorations that hung from the ceiling were also from the dollar store with all the Easter stuff.

Playing card garland - also from the dollar store, I punched a couple of holes into each card and strung them up to create a garland.

I also used a roll of craft paper and poster board to create the rabbit hole by cutting out the hole and adding some mushrooms.  We hung this in the doorway to the party room and the kids had to crawl through.  That was a lot of fun!  Of course, we added a few arrows saying, This Way, That Way, and The Other Way!  And arrows over each birthday girls seat with their names on the arrows.  A mix and match of table coverings and chairs to mimic the Mad Hatter's tea party worked great - we just used what we had on hand.

I also added "drink me!" and "eat me!" tags to the teacups and plates as well as to some little bottles I thrifted.

As each guest arrived, we gave them a ticket for the movie.  We had them pretend to drink from the bottle that said "drink me" and then showed them to their seats.  We had the Alice in Wonderland movie set up (there is a great 1999 version that is a modern update to the classic - NOT the Johnny Depp version!).  When we brought them into our family room, we had a row of chairs set up from the girls American Girl and Barbie houses and pretended that they must have grown and therefore, wouldn't fit on our seats.  They thought that was funny!  Then we watched the first half of the movie, up to the tea party scene...that made them hungry and so we went out to the party room and ate.

Queen of Hearts - of course, there HAS to be the Queen of Hearts!  I obliged and surprised my girls when I came down in a red ruffly shirt, black sweater and skirt and one of their huge hair bows on my head.  I painted some craziness on my eyelids and added a heart to my cheek and embarrassed them by talking in some weird British accent most of the day.  The Gardener had his Mad Hatter hat on for all of 5 minutes.  Sprout thought we both just looked funny!

I found a mirror at a thrift shop and I'm going to hang it in my sewing room but I used it on the food table for the party - it was really pretty.  We served fruit and veggie trays with ranch dressing and peanut butter dips, chocolate covered strawberries and pretzels, and pink lemonade and sweet tea, of course!  Maybe because the girls were all dressed up or maybe because we were using real glass serving ware but they were so well behaved at the tea party...it was funny!  Not that I expected them to not behave but they were all being very proper and using such nice manners.  

Games and Crafts - I think it goes without saying, if you have an Alice in Wonderland party, there will be croquet.  So...Ohio this time of year, well, it was windy, overcast and barely 40' outside BUT darn it, we did play croquet!  And the kids loved it!

We also set up a photo booth which was really fun!  Being close to St. Patrick's Day and Mardi Gras, I was able to easily find fun crazy glasses and hats at the dollar store.  The kids could put on whatever and pose in front of the backdrop which was plastic table cloths hung from the ceiling along with balloons and some playing cards.  We turned on some music and they had a blast snapping shots.  Even Sprout went crazy with all the big kids (she's such a trooper - she's been icky sicky with a cold all week).

We made these simple marble magnets - I read about these probably 7 years or so ago in Family Fun magazine and we make them often.  Just button magnets with images (I used my alice images I found online) with those floral marbles that are flat on one side all glued together.  The marble magnifies the image.  Pretty cool.  I also found this inexpensive ball chain that we cut to length for each girl and these key pendants.  The girls then had to add a jump ring and string them on their necklace.  Both made for great party favors.

Cheap is how I like to go so I opted to use these lunch bags as their favor bags.  I think they were $1 for 50 and then I added a tag with each girls name on it and some ribbon.  I also added a few stickers and a crazy straw to their bag to add to their key necklace, magnets and cupcake plates as Favors.

But the big favorite as far as favors go had to be the hairbows.  My friend Kelley from our twins club has the cutest bow shop and made up these hair clips for all the girls.  I have a basket full of her bows for Sprout and the Peas - they are super cute and really fabulous quality!  This picture I swiped from her facebook page isn't the best quality photo - the girls were so excited about these I didn't even get a chance to take a quick pic!

After the tea party and croquet and photos and crafts...the girls were ready for CAKE!!

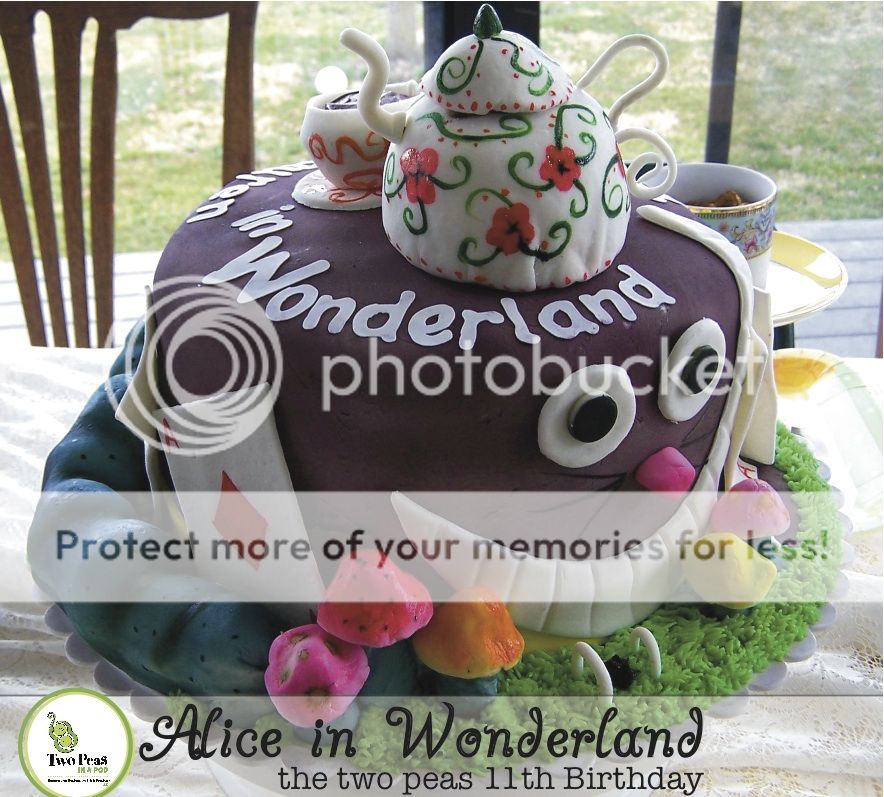
My BFF Kristin (who also helps me with my two peas business) is an amazing cake maker!  She gifted the girls with this cake for their party.  It was off the hook, crazy AWESOME!  She had their names on it, cards, mushrooms, the white rabbit and his watch, the caterpillar, the cheshire cat and his big grin...topped with a teapot and teacups.  All handmade fondant and hand painted by her and her daughter, who is one of the two peas BFF's.

On top of that - the inside was a white and purple checkerboard!  It was a huge hit at the party and yes!  She is for hire!  (She's driven as far as Texas before to deliver cakes but if you're local to Columbus, she loves to make cakes on the weekends for all kinds of parties for a little extra "mom" money.  You can get in touch with Kristin at kristintwopeas at gmail dot com).

With 11 girlfriends - most of whom they have been friends with since they were 3 or 4 years old, it was a great way to celebrate the Two Peas 11th birthday!  I love you girls to the moon and back!

Happy Happy Birthday!

: : photographer wanna be? read this : :

I have the pleasure of calling Britt Lakin a friend.  She is also the exclusive commercial photographer for Two Peas in a Pod Homegrown Designs.  (Yes, those are all of her shots across the top of my page here and along the sidebar - fabulous aren't they?!)  It all started HERE.  She has the ability to always get the shot exactly as I envisioned and most of the time, surprises me with how it is even more amazing than I dreamed.

Britt does portrait and wedding photography here in Columbus, Ohio but she has also travelled across the country to some pretty awesome places to photograph weddings and such for clients.  If you love photography, it is so worth following her on Facebook or following her blog.  Eye candy galore.

If you want to learn how to take fabulous pictures like Britt...or at least TRY then you will want to take a trip to visit her this August here in Ohio.  She is offering a fun interactive class that will teach you how to take pictures of your family like a super star!  Check out the course info below and have fun!

: : it's sew easy NOW : :

it's sew easy tvSo...I did this little TV thing awhile ago.  It was a ton of fun and I have been so incredibly blessed to be a part of it and thankful to be included.

If you click over there on the right where it says "It's Sew Easy TV" you can read more about it.  On their website you can check on your local listings to see when you can view the show in your area.  The nice thing they have going on RIGHT NOW is each week, a new episode is viewable on their website for the entire week.

For this week, it's an episode where I'm sharing a project you'll like for simple gift giving.  Summer is a great time to start getting your gift giving projects started for Christmas...right?  Finish by October and enjoy all the fun stuff during the fall season into Christmas.  Oh, who am I kidding?  I always wait until the last minute but I highly suggest not doing that!   Here is the info on this episode.  Click HERE to watch.

Today our experts show how it’s sew easy to bring your gift giving to new levels when you sew. Bring new meaning to “it’s the thought that counts” when you incorporate sewing into specialized gifts that reflect your techniques and your recipient’s interests.

Welcome to It’s Sew Easy where our many experts break sewing into manageable parts as they share their own unique style in projects and techniques. Whether you’re a novice or experienced sewer, It’s Sew Easy will enhance your sewing skills so you can create personalized apparel and home accents.

In our first segment, pattern designer Colbey Decker shows how to create a computer tablet cover featuring grommets and menswear fabrics. Next, Trish Preston demonstrates how to use bias tape for lanyards, purses, and flowers. Lastly, designer Nancy Odom demonstrates a tote pattern that can be personalized for all ages.

{national quilt association show - you. must. go.}

June 14th - 16th here in Columbus, Ohio - the National Quilt Association hosts their annual show.  Now, I've not actually been to this show but my friends in the know say this is THE place to be this weekend.  If you like quilts, you'll love this show. My friends from The Glass Thimble, Jamie and Justine, have a gigantic quilt shop here in Columbus (in the Clintonville area) and they will have a booth at the show.  Chances are good that you might find a bunch of Two Peas stuff there and at a great price.  Ok, chances are better than good...just sayin.


{SPROUTS SUPERHERO PARTY - PART 2}

Part Two

Our little Super Sprout turned 4 last month and I promised to share the details of her party and I started right HERE.  Oh I whined and complained about internet connection on that post and guess what?!?!  We just got a 4G myFi connection device from our cell phone carrier and hot dog!  We actually have reasonable speed and connectivity!  Feel like I've been living in the dark ages with no internet.  Super happy.  Super.  Happy.

Oh?  Party?  Yes...I was getting to that.

I trailed off on the last post when we were getting to the games.  So, here's the 411:

1) Super Hero Strength Training.  Sprout was kicking butt and taking names here.  We used one of those inflatable punching things...I don't know what they are really called - but I got it for like $6 at the store.  Worked like a charm.  The guests had to hone their power punches to get the bad guys.  Good times folks.  Good times.

2) Vaporizing Villains.  It was FREEZING cold outside the day of her party which is unusual so we had to keep everything indoors.  I hung up a plastic table cloth, taped up our comic book villains - add a can of silly string for every kid and wham-o!  Instant happiness all around.  Big hit.  Easy clean up.

3) Throw a Mighty Super Disc.  The peas had more fun with this than anyone.  They set up a million different stacks of these cups and then the kids would throw a ball or a frisbee and knock them down.  We played this for-ever.  They loved it.  Even after all the games were over, they came back to this one and asked if we could play it again.  Big hit.

4) Bat Cave. Not one single picture.  I guess we were having too much fun we forgot to get a picture of this.  I used about 4 black plastic table cloths and taped them up in a doorway and out into a room over some chairs and low tables to make a maze and create our dark "bat cave".  Then we threw in some "kryptonite sticks".  The kids had to crawl in and bring out 5 one at a time.  They did this over and over again.  So much fun!

5) Superhero Cape Ceremony. After each kid successfully completed the tasks set before them in the Superhero Academy, they were then awarded their superhero capes.  Sprout loved her her Super "S" cape!  And that also was one of the party favors for the kids.  Labor intensive - not too bad.  If anyone is interested, I'll be glad to share my pattern.  I actually just used one of baby bib patterns and enlarge it to get the neck shape and then freehand drew the rest.  It worked great!  I used ric rac trim, felt for their letter shield and then I made felt flowers for the girls and put those on the ties up front with velcro.  I made them all velcro closure.  And they are lined which in my opinion, made them easier to put together.

My friend Kristin, who also made the peas cake over HERE, (scroll through those pictures and you'll see Sprout at that party in her Batman shirt and tutu) made Sprouts Batman Cake.  It also had a bat signal spotlight cake beside it.  Now, Sprout asked Kristin about making her this cake for months and months.  When the time came, it turned out Kristin ended up with a foot injury and had to have surgery.  She was maybe 4 days post surgery with a bone added and about 10 pins when she made this cake.  Pretty darn amazing I think and Sprout LOVED it!

This was probably one of the easier parties I've done, thankfully.  And Sprout still thinks Batman is the best thing ever.

{SUPER SPROUT's SUPERHERO PARTY}

PART ONE:

Our little Super Sprout turned 4 last month and I promised to share, and finally I do, the details of her party.

We live on a road considered "rural".  Although we have close access to everything - we have no cable, no internet connection, nada.  Right?  You've heard me gripe about this before.  It's why blogging can be so hard for me because by the time I edit and load photos into a post - it's about a 1.5 - 2 hour process.  Sloooow speeeed.

Anyway, I digress.  There is a silver lining to the whole "no cable" thing and that is that we only get a few TV channels and one of those is the "retro TV" station.  On Saturday nights at 7pm, it's like clockwork.  Sprout will start asking, "Is Batman on soon?  Now?  Now is it on?  Now is Batman on?".  The girl has a serious thing for the old Adam West version of Batman ala 1970's.  We scarcely ever miss an episode.  So to no surprise, she started asking for a Batman birthday party about 6 months before her birthday.

We compromised and made it a "superhero" party - hey, we didn't want to leave any superheroes out.  We are an equal superhero household.

Don't ask.  I didn't have a superhero outfit of my own and so I guess I thought dressing like a goofball in a cape with a star on my cheek would fit the bill.  I was right.  Sprout loved it.  Hey, if my girl is happy, I'm happy.  Our decorations were pretty simple.  I started with some polka dot fabric for the background, kind of like a comic book backdrop, yes?  Then I added a comic book banner.  I actually bought a comic book and cut it all up.

Let's just say comic books aren't like they were when I was a kid.  Um, hello...barely appropriate for kids...what's up with the girl wonder and her big you-hoos and skimpy-ness yada yada yada?  I actually had to censor most of the comic book.  Who knew comics could be so offensive these days, wow.

I added "power aid pellets" aka M&M's because Sprout is a fiend for those candies.  Wrapped a couple of shoeboxes.  Added some of our batman toy collection.  Yes, we have a collection.  And used blue and red bags as our favor bags loaded with some goodies for superheroes.

superhero birthday party

You can click on the graphic above, slide it into photoshop or duplicate in a word doc, however you know how to use it to make copies for yourself and your own superhero.

Love our sunroom.  It's our go-to party spot.  Industrial strength carpet.  Nice views.  We love it.

Once our SuperHero friends arrived - it was time to start our Superhero Academy Training.  We started with our SUPERHERO STRENGTH TRAINING.  Sprout loved this.  Way too much.  The girl is a power house.  She took down the inflatable spider-man like nobody's business.  She's learned a lot from the "real" Batman, don't you know?

Well, there was a lot more mayhem and fun had but you'll have to come back later to see the rest.  Serious, I'm at roughly 2 hours to get this post to this point...I'm headed to my superhero mommy bed.  Part Two will be next up!


{SUPER SPROUT!}

Super Sprout celebrated a super 4th Birthday recently...we vaporized villians, went to the bat cave, practiced our super hero skills - all great fun.  I'll be sharing the details coming soon right here including my pattern for our super hero capes!

(someone please tell me how on earth this sweet baby girl has turned 4 already!!  Now...if only I could talk the Gardener into adding one more sprout to our pea patch.  I keep telling him the 4th time around - will be a boy for sure!  But with 3 girls, I don't think I have him convinced!)

{thrift store makeovers}

Without a doubt, one of my very favorite things to do...thrifting.  Or dumpster diving.  What is better than driving around town on trash day and finding some fabulous furniture pieces set out at the curb?  My girls have an amazing art deco style drawers with a gorgeous curved mirror...in the trash...and now adorns their fancy schmancy playhouse.  Thrift store decor...a serious weakness of mine.

Sometimes I keep the stuff I find and makeover.  Sometimes I give it away.  It's just fun to recreate something and save it from the landfill.

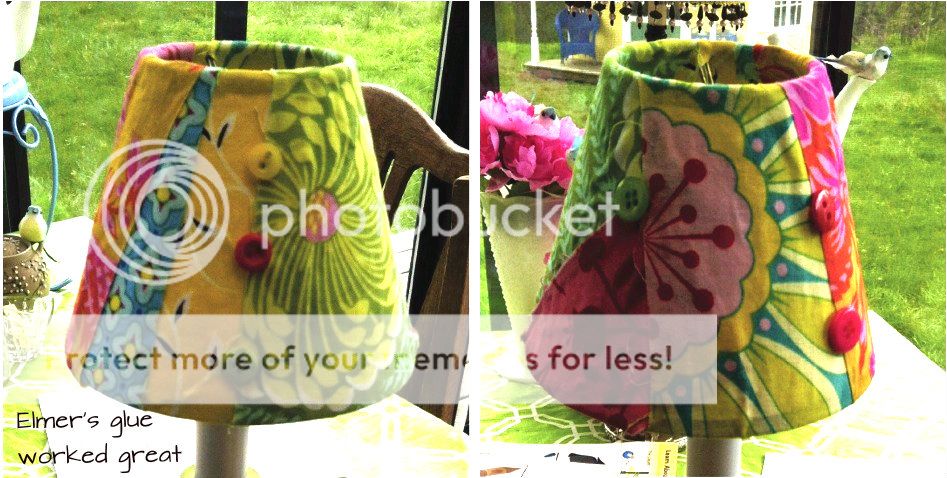
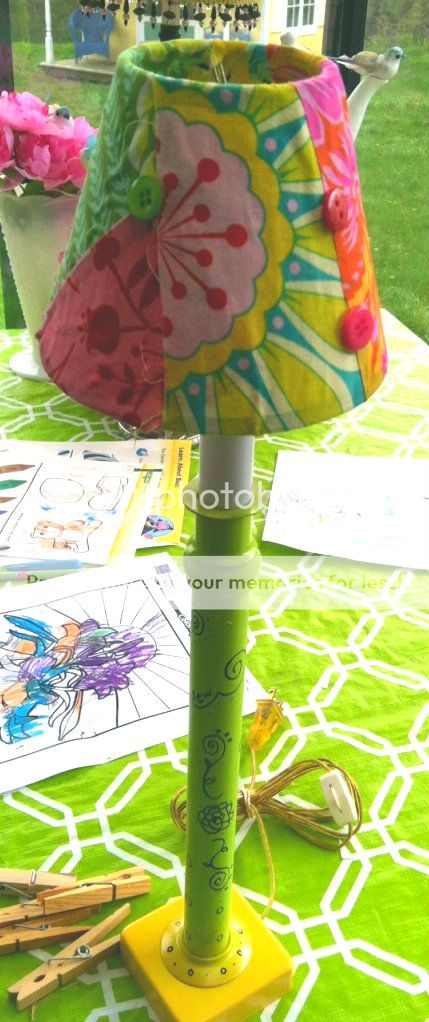
Here's one of my latest :: a new lamp for Sprouts bedroom.

THIS is what it looked like the day I saved it from the thrift store.  

A little spray paint to the base...

...and I added some doodles with my paint pen.

Then I covered the shade in fabric scraps and buttons...

In all, this project took me : 5 minutes or less to spray the base.  5 minutes with the doodles on the base once the paint dried.  10 minutes to add the fabric and buttons.  Pretty quick and Sprout loves it...it's in her room currently but I'm thinking about stealing it for my sewing room!

Have you any thrift store decor makeovers you love?  Your own or someone else's?  Share a link in the comments...

{you might like THIS POST too!}

{the very versatile tie tote}

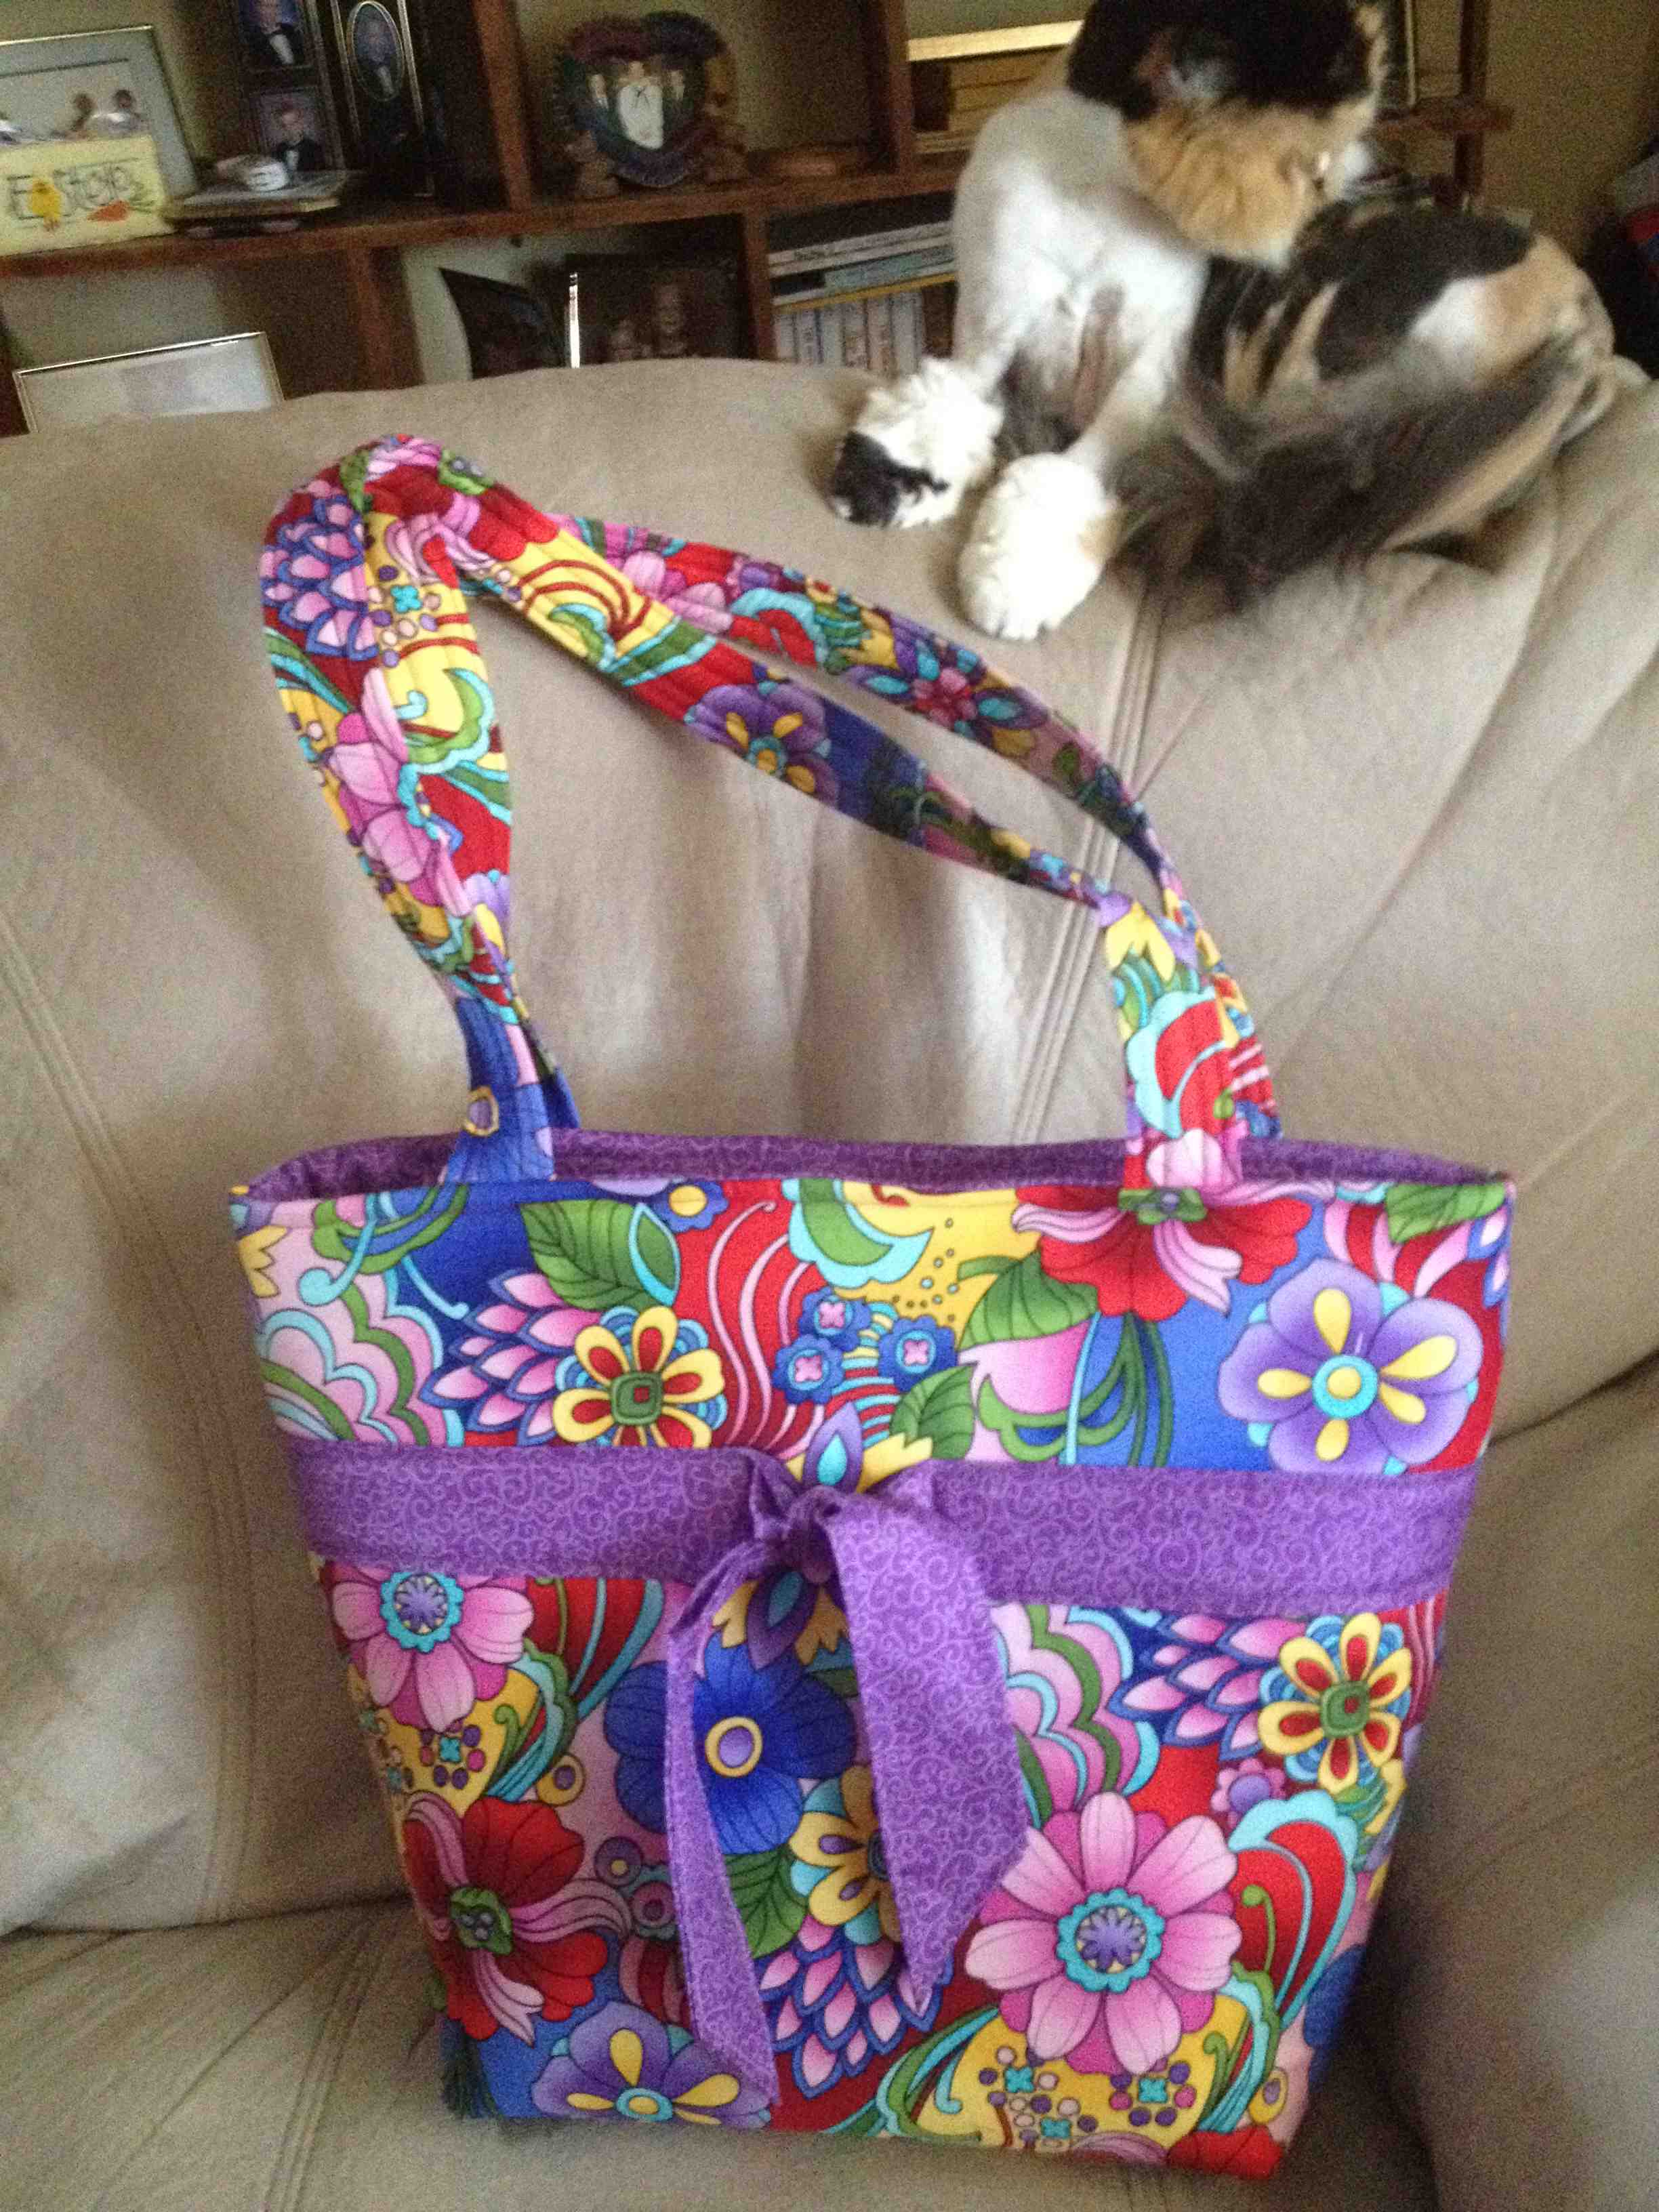
Trish Thanks so much for this class/pattern! I finished my bag today! I have to confess, I am something of a "bag addict", and this is one of the fastest, easiest patterns I have found, your instructions were so easy to follow. I loved the videos, I could almost make the bag just by watching the videos alone! Thanks so much! I've aattached a picture of my bag!

Jenny

I have had such a nice response to the Tie Tote e-class...and I'm excited to tell you that we have another that will be ready very soon!  The next class will be the very popular Hazel Hipster!  Jenny, a very nice reader sent the picture of her finished Tie Tote that she made recently...I especially love the kitty lounging on the back of the couch!  What a great color combo for Spring!

What are you sewing up lately?  I'm opening up a link list so you can share what projects you are working...I'd love to see!