{sew, mama, sew giveaway day}

Let the "giving" continue!  I've done not much blogging this month but a whole lotta giving and that dear friends, is a good thing.  Our family has been busy with the season and family time and I'm not one to miss out. SO...back one post, you'll find the giveaway I'm doing with Where Women Create and their 12 Days of giving series...and here I am, playing along with Sew, Mama, Sew.

If you are new here, nice to meet you.  Take a gander over there to the right side bar and browse around.  You'll also find up there links to chat with me on Facebook and Twitter (I'm on facebook...way too much...good chance you'll catch me there more than here).

So let's get to this whole giveaway thing, shall we?  Go HERE to see the full list of all of the Sew, Mama, Sew Giveaways.  Happy Holidays to YOU because it is awesome!!

Today, I'm giving away several things.  Some supplies, patterns, a bag and my e-class.  Keep reading!


Here's the deal...I'll be giving these away as 3 separate prize packages.

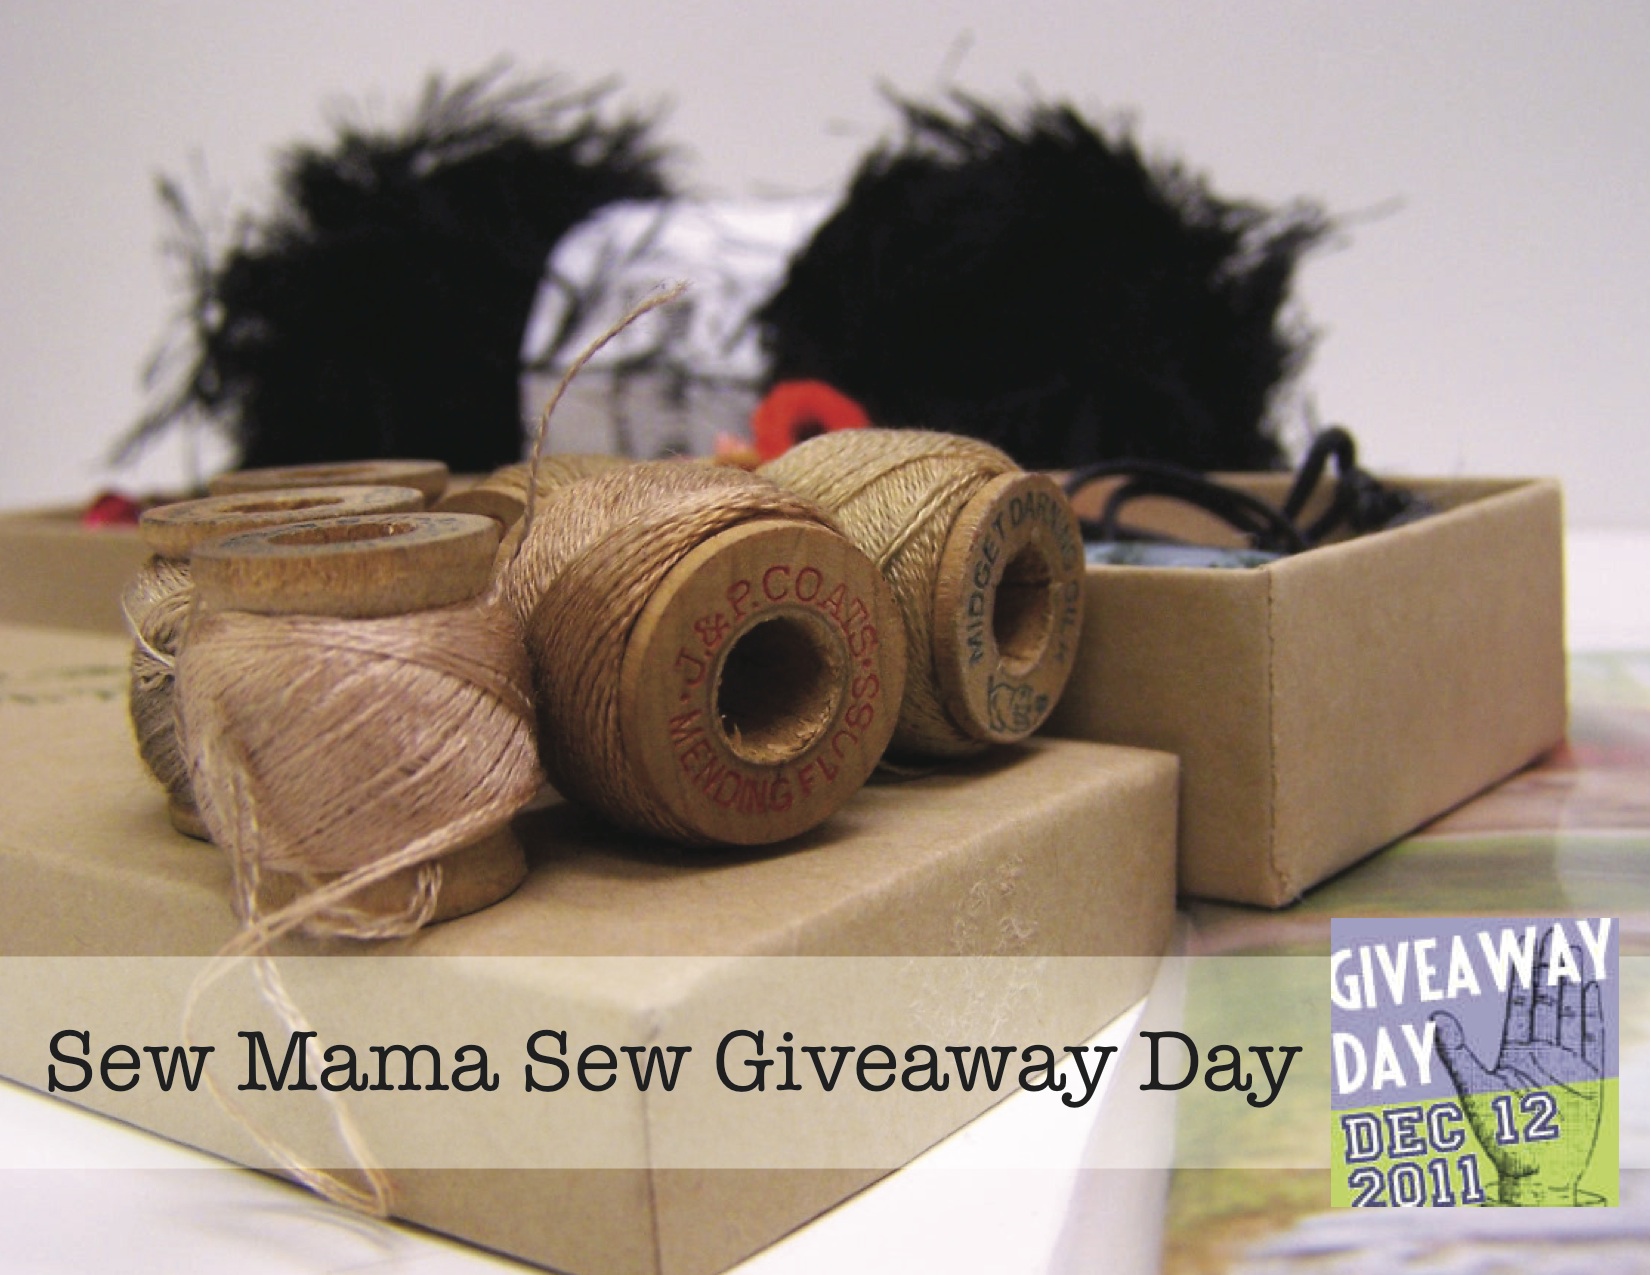
1) the supplies including my score (ok, my parents scored this stuff at an auction - I'm sharing with you) of the vintage silk spools, brooches, yarn and patterns.  I love to display old thread spools and buttons in glass jars in my sewing space.  And I LOVE using brooches on my bags 

2) The design sample - Tie Tote bag.

3) A seat in my e-class so you can make a Tie Tote for yourself.

and one more....

4) A $20 shop credit.  There's a catch to this one...

The giveaway is open until December 16th at 5pm PST.

I'm happy to ship internationally so this is open to everyone!

To enter, please tell me who YOU would like to give the $20 shop credit to and why.

Who in your life has done something special for you or is deserving of an extra treat?  We will let Random.org choose the prizes 1-3...and for the shop credit, we will let my "two peas" choose the winner of that one and we will award that shop credit to the person you indicated you wanted to gift this surprise to...sound good?!  (I'll have something for the winner of that too!)

One last special treat, for our friends from Sew, Mama, Sew...if you're interested in the Tie Tote Sewing Class for yourself...today through December 16th we will have them discounted and available for only $14.  (That's $6 off!  and the price of a paper pattern in the store only this one you get 45 minutes of video instruction from yours truly that you can view anytime you want from the comfort of your sewing room, jammies and all.)

Happy Sew, Mama, Sew Giveaway Day! 


the 12 days of christmas {where women create style}

Oh how I love this time of year.

love.

love.

love.

The fabulous ladies at Where Women Create asked me to participate again this year in their 12 Days of Christmas celebration.  You guys, this is so much fun!  For 12 days, there are 48 crafty ladies who are giving away LOADS of goodies.  No hoops - just leave a comment - each of the 12 days to be entered to win some serious loot!

What I love about this is "meeting" so many talented artists via their introductions and posts.

As an added tiny bonus to my giveaway over at the Where Women Create blog, I have another little treat.

I have a couple of extra magazines - the STITCH Fall 2011 issue that featured one of my patterns and a Spring 2011 Sew Hip issue with a Two Peas feature.  I'd love to share those with a couple of you.  Simply leave a comment here and I'll pick 2 of you and send off these issues for you to enjoy.  Guess what else?  I'm going to add in with the magazines a cute little zip pouch from my stash!  What you get will be a surprise but I promise you'll love it!

12 Days of Christmas - love it!  Hop over to Where Women Create everyday starting TODAY through December 12th for their giveaways.

And then Leave a comment here to be entered for the zip pouches and magazines (2 winners) and I'll leave this giveaway open until December 12th.  I'll pick 2 winners and announce them on December 13th!  Have fun and Happy Holidays!  THIS GIVEAWAY IS NOW CLOSED

monday mornings inspiration {the blue ladybug}

What inspires you?  To create and craft and sew.  

I’d love for you link up on Monday Morning for some inspiration.  I am not one of those that hates Mondays.  I love Mondays.  I’m ready to get my work done for the week and anxious to jump in.  What a great way to start the week, sharing what each of us finds inspiration in and in turn, inspiring each other.

Todays Monday Morning Inspiration is my friend Mary Beth...

Hello Everyone! I’m Mary Beth, from The Blue Ladybug Blog and Shop. I’m so honored that Trish asked me to guest post for Monday Morning Inspiration! I think Trish and Two Peas in a Pod are so inspiring- I particularly love the bright colors in her fabrics and photos, and the fun projects she creates. Here’s a little about me and what I’m currently inspired by…

 I’m a mom first to Titus who just turned 2, and our baby girl that we’re expecting Christmas week! I’m involved in our local Mothers Of Preschoolers (MOPS)group, and in our church and youth group where my husband is a pastor. I started sewing when my son was born and then started The Blue Ladybug :: Children’s Boutique with my friend, offering matching brother sister clothing sets, which has grown to many other clothing and accessory items in the past year and half that we’ve been in business!

My sewing career began with a desire to make boy crafts and practical items! That’s been my whole angle with business and sewing… I’ve made clothing and belts, ties and bowties. Wet bags, pacifier clips, burp cloths etc… And most of my fabric stash is boyish.

Then I found out I was having a girl… Sure, I was excited, but I was also overwhelmed with all the options for girls out there! Honestly, I always liked that I didn’t have to think about the endless ideas for girls in the craft world, but here I was about to have one of my own… So I took a deep breath and took the plunge! The day after finding out I was having a girl, I walked down to our local quilt shop and picked out some cute fabrics all in PINK! :) Forget being practical, I started dreaming off all the bows and ruffles and every impractical item I could make for her!

I’ve been having a more difficult time with my pregnancy this time around. Once the third trimester hit, I’ve been in seemingly constant pain! I even ended up in the hospital with the flu and dehydration. And I’ve been having trouble doing as much as I was before, plus taking care of a toddler. And because I’ve been so much busier this pregnancy, I realized that I was NOT ready for this girl to be here! Sure I have most of what I need, but I hadn’t done anything in real preparation to help myself feel mentally ready to have her. You know what I mean? So I went to my Pinterest boards (follow me) and made a list of girly projects I wanted to get done before she comes…I realized that I needed to stop looking for inspiration and start actually doing the things I was inspired by!

Here is my Monday Morning Inspiration- my baby girl! I'm so excited to share my creations with you today!

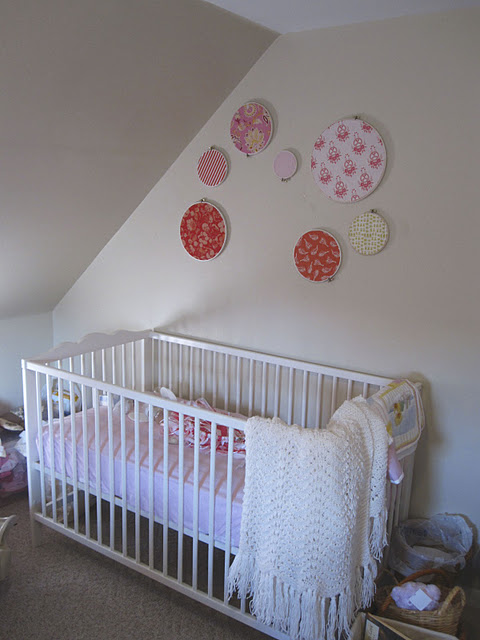
We kept our guest room, but added her crib to one wall (which will eventually be gray- please use your imagination :) ) The wall art is fabric stretched over embroidery hoops, and her name (painted on wood letters) will go in the center (we didn't put it up yet because it’s a secret hehe).

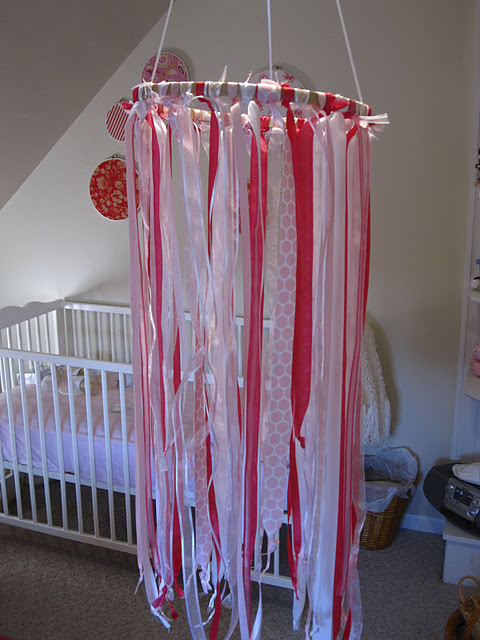
This ribbon mobile was what I was most excited about making! :) We have yet to put it up, and aren't entirely sure where to put it because of the wicked slant in the ceiling and the wall was shorter than I thought :/ But I love it and I'll find a spot for it! :)

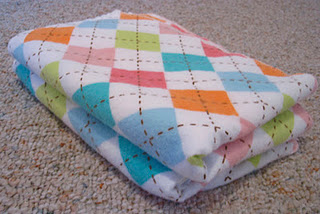
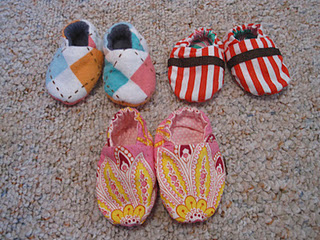
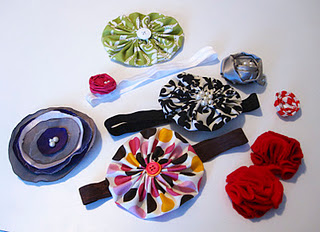
I’ve also made some receiving blankets, crib sheets, booties, and flower clips on headbands.

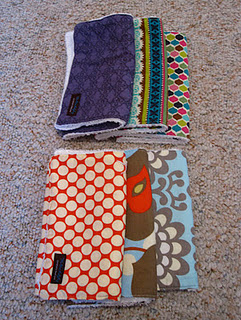
The paci clips and burp cloths were stuff from my shop that I had on hand!

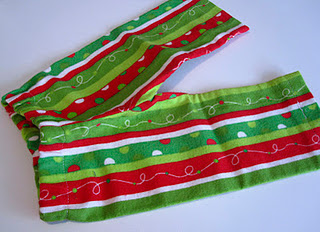
I even made some adorable little Christmas PJ pants! (yes, I’m counting on her being early like her brother!)

I have a couple projects still to go… Hoping I get them mostly done in the next month!

-A Diaper bag tote, wristlet and wallet

-And a Quilt using the incredible Heirloom in Ruby Fabrics from Joel Dewberry. (yes, I gotta get cracking on that project!)

I can say that completing these adorable projects and getting her room (mostly) done, have helped me become more ready for my baby girl to get here! It feels so good to actually do the things that I’ve been inspired by! And doing all these projects, even though I’ve been busy and very uncomfortable, has helped the waiting go by quicker! 
Thanks for reading my inspiration! I’m excited to see how having a little girl will inspire me for years to come!

Now it's your turn...link up your latest inspirations!  Be sure to link back here {http://twopeasinapoddesigns.com}

{Christmas stocking pocket banner - a tutorial}


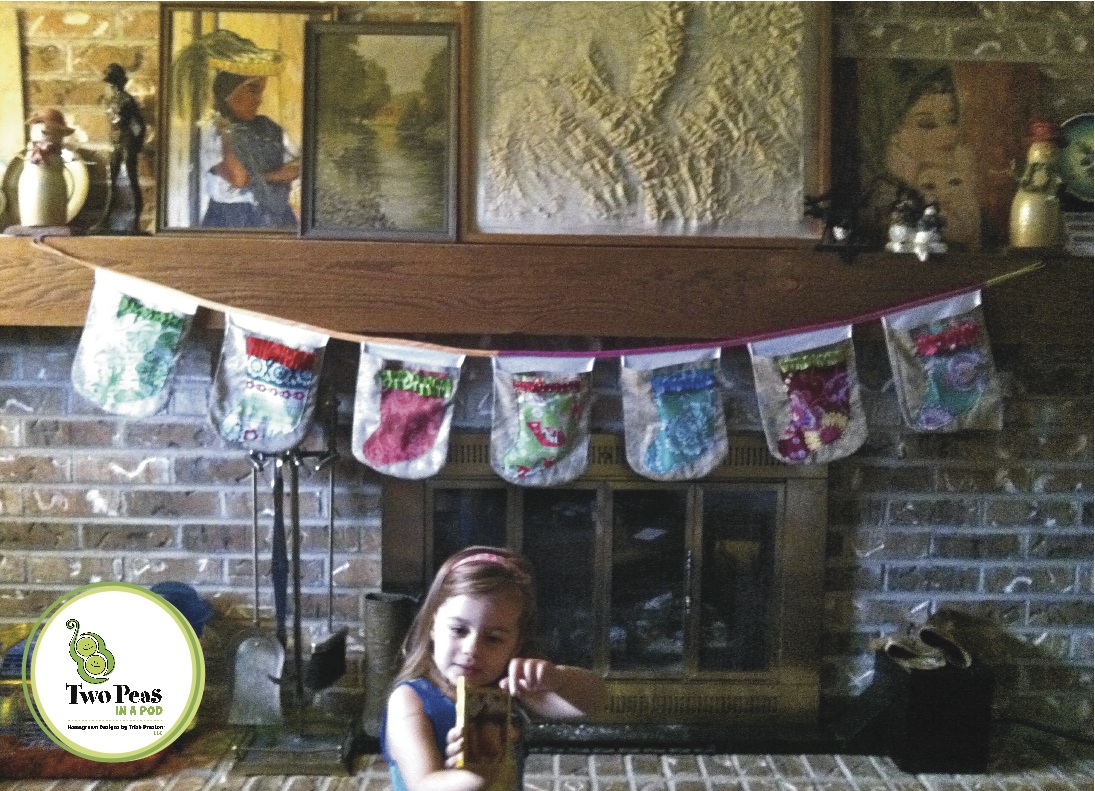
Christmas Stocking Pocket Banner - I wanted to come up with a cute decorative item that we could make into a fun activity with the kids.  The idea behind this banner is that the pockets will hold scripture and notes from us to our kids along with something fun like a piece of candy.  I made this banner to have 7 pockets - one for each day of the week but you could also make a smaller version that includes one pocket per child and refill each pocket every day.  You can fill both the little stocking plus the bigger pocket.  Bonus!

I decided I would have one for each day of the week and fill it a week at a time.  I'm hoping their excitement will be contained and they will keep themselves from looking ahead into the next days stocking pocket...I'll let ya know how that goes!

This is a great project for using up some of the larger scraps you have in your stash.  You could also use fat quarters but I really try to use what I have on hand and use up odds and ends to save money.  I also used on this project a flat sheet that I purchased at a discount store.  I used that for the back of the pockets which is a great way to get a lot of bang for your buck.  Even a pretty Christmas flannel sheet would work well.  Check out your local quilt shops too because I have seen some killer deals on seasonal fabrics!  (if you know of any good sales - list the links in the comments section!)

Materials:

A stack of scraps or fat quarters to create your stockings and pockets - the amount depends on how many pockets you are creating.  1/2 yard of lining fabric, 1/2 yard of pocket front fabric is what I roughly used.  Plus my scraps for the stockings.

You will also need ribbon or other fabric scraps to create some ruffle embellishments on your stockings.  Get creative here!  Embellish with ribbon, ric-rac, lace, textured fabric from old clothing scraps like wools, etc.

 And you will need bias tape for hanging.  I again, used scraps of ready made bias tape I had on hand and patched them together.  You can also make your own bias tape but cutting your scrap fabric 2" wide and pressing each long edge in towards the center and then in half again. 

1)  To start, click on the pattern and print it out.  It has been designed to fit perfectly on an 8.5" x 11" sheet of paper.  I found that when I went to print this direct from the photo from the blog post, that I needed to increase the size to 125%.  You can see that the pockets are the size of a sheet of 8.5" x 11" paper - simply place the corners to the bottom of 8.5" x 11" sheet and cut the corners rounded out as shown on the pattern.  Those bottom corner pieces should fit perfectly to the bottom corners of your sheet of paper with 2 1/2" of space between them along the bottom.  Make sense?  You will need to cut 2 per pocket - a front and a backside of pocket.  I used nice fabric for the front and just an inexpensive cotton sheet for my backside of pocket.

2) Cut your stockings out using the pattern - cut them all facing the same way.  Your stockings should be about 8 1/2" tall from the longest points.

3)  Pick out your embellishments for each stocking.

4) Next, embellish your stocking.  Leave them raw edged (remember, I'm a nap time sewer and frugal - no lining these guys.  Leaving them frayed and vintage looking).  I used ribbon on all of mine to make it quick and just gathered them by hand and pleated and created ruffles.

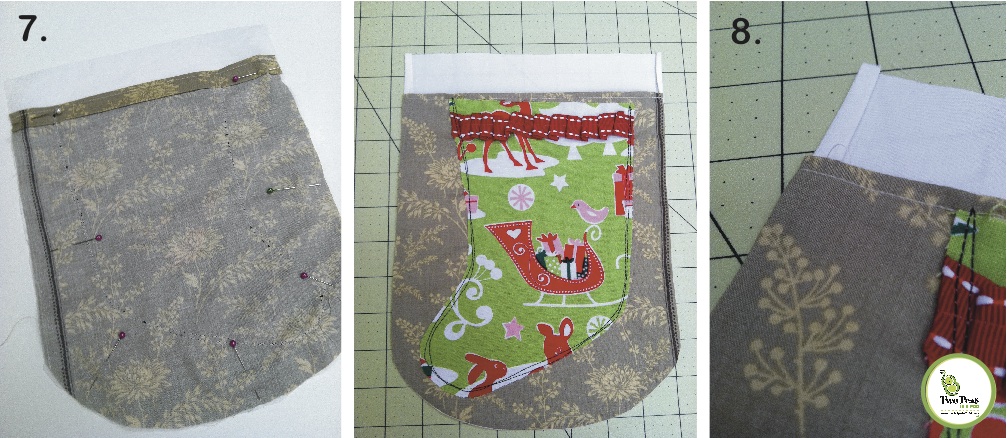
5)  Press under the top of your outer pocket 1/4" and then again about 3/4" - 1".  Topstitch to hold in place.

6)  Pin your stocking on to the front of your pocket.  I used black thread and stitched multiple times haphazardly along the edges (DON'T sew across the top - leave it open so you can stash little treats inside.) to attach my stocking. 7) Lay the front of your pocket onto the backside of the pocket with right sides facing, pin and stitch.  Clip your corners.  Say what?  That means all along the edges that are curved, use your scissors and carefully, cut a slit in the fabric but DO NOT cut into the seam.  This helps to let the item pull and then lay flat instead of puckering along those curves.  Turn your pocket right side out and press your seams.

**NOTE**  When I'm piecing something like this together, I use a stitch length of about 2.5.  I also will use a fresh universal needle for a project like this.  FRESH because each time you sew - you dull your needles.  If you wait to change out your needles until they break, chances are you are pulling your fabric and distorting it some by using a dull needle.  SO change them out frequently.  When I topstitch, such as I did when I attached the stocking to the pocket front, since I was doing multiple lines of stitching and doing what I consider a decorative stitch method, I moved to a stitch length of 3.5.

8. Because our pocket is lower than the backside, it leaves us with a bit of a raw edge showing along the edge on the backside pocket - I simply just tucked it under a bit and gave it a press.  When it goes into the bias tape, that will hold it in place.

9) Last, to finish up our banner, use your bias tape to attach the pockets all together.  Leave about 14" at the end for tying it up.  Start placing your pocket into the bias tape.  Place your pockets 2" apart along the bias tape.  Obvious maybe but just to clarify, open up the bias tape and place the pocket in the center (just the backside of your pocket will reach into the bias tape), pin and stitch down the full length of your bias tape.

10)  At the end, fold your ends under and stitch to create loops for hanging.

NOW...let's hear your ideas about what to fill them with!!  I had planned little notes and small treats but what suggestions do you have?

And if you don't have a mantle to hang this on, this would work perfect along a staircase railing or on the wall.  OR you could even sew a much larger version of the stocking onto an old vintage pillowcase and put it on your child's chair at the dinner table - then fill it up and let them find some goodies in there when they go to eat breakfast!

Of course, when I hung this inside on our mantle, Sprout was super excited and wanted to know if Santa was coming TONIGHT.  Sadly, no honey.  Not tonight but soon.  Actually, I was a little leary of her trying to reach into these pockets with them strung from the mantle so for safety sake, I'm hanging this down low and along a wall in our kitchen where the kids can easily get into the pockets and I don't need to worry about somebody pulling the entire mantle from the wall down onto themselves.  What?  In my house, that would totally happen.  Right?  Kitchen it is...


{going to special places}

One night last week, I went someplace that I had not been to in a very long time.  I hadn't even thought about this place in many years.  The last time I was there, I was maybe 12 years old, at best.

But when I walked in, everything was exactly as I remembered it.  No one was home but coming through the front door, I could feel the sun warm me as it came through the sliding glass doors opposite the front door.  There was candy in the dish that sat on the dining room hutch just like I remembered it.  In the kitchen, I immediately found the vintage juice jar that I remembered my grandmother using and the little glasses she served the juice in.  The table was tucked away along the wall, tablecloth covering it but no plate of butterscotch cookies like she used to make.

The floors looked the same.  The light switches made the same sound when you flipped them on that I remembered.  The doorknobs turned the way I remembered and my feet made the same sound I remembered when I walked across the hardwood floor in the spare bedroom I used to nap in.

And then I heard some laughing, and there was a fire in the fireplace, and I found some things that I had never seen before in a box in the corner.  And someone said to me, "Those are for you - we've been saving them up to give to you".  When I turned around, I was so excited to see it was my Grandfather.  I hadn't seen him or hardly thought about him in the almost 30 years since he passed away when I was a child.  He looked exactly as I remembered him.  He had the same funny laugh and sweet appalachian accent that I hadn't heard in forever.  He and my grandmother used to call me "tree-sha" and would say things like "mursh-rooms" or "worsch"  (Tricia, mushrooms and wash if you're not from Southern Ohio).

I don't know what prompted this dream.  It was so vivid.  So real.  For days, I haven't been able to get him out of my mind.  When I woke up, I remembered every single detail of that dream which is rare.  I've poured back over those memories a thousand times since that night and I can't stop thinking about his face and his eyes and his smile and that moment.

I don't believe in ghosts and I'm not really sure I will ever be able to explain what prompted that dream.  But it was so comforting.  I felt like I was being watched as I grew.  That I was being nurtured and cared for.  That he was still with me even though not physically.  He still knew me even though I had grown so much since he saw me last.  He knew me and he loved me.  And I remembered how much I loved him.

I have only had a dream that was so vivid and that I remembered that well one other time, and that was about my sister who also passed away when I was a child.  I think I was 15 or 16 when I had that dream and she died before I was even 2 years old (she was 15 when she died).  It does make me wonder if we visit with those we love who have passed on in our dreams...that when we close our eyes, we allow ourselves to go places that sometimes are too painful to think about when our eyes are open.

It sure made me smile though, being in that place, remembering the sights and sounds and smells and the feel of that special place...and hearing a familiar voice and seeing a familiar face.  Whatever it was, it was good.

{homegrown holiday barter party}


This Christmas, I really want to focus on everything BUT gift giving.  I really hate that part of Christmas honestly.  Don't get me wrong, I love seeing my kids smile and all the excitement of Christmas morning.  But I hate the shopping.  I hate the spending.  I hate the pressure on getting "the perfect gift".  The whole commercial aspect of Christmas gives me the hives.

We've told our kids that Christmas gift giving is about celebrating the birth of Jesus where we all get to celebrate in that special day and exchange birthday gifts.  They get it.

But I really hate the race to get everything in order.  Do I sound like a total bah-hum-bug?

I love going to holiday craft shows.  I love going to our little towns holiday festival and parade and watching Santa ride in on the fire truck.  I love going on a drive through the neighborhoods and looking at the lights.  I love sharing a meal with friends and co-workers and giving thanks for our blessings.  I love fires in the fireplace and our tradition of cooking s'mores on Christmas eve while watching Polar Express.

It's all great stuff.  I just hate the spending part.  I hate the pressure of feeling like I have to spend this wad of change at this time of year.  I'm just not going to do it.

And I don't know about you but, this economy has me worried.  I have watched the cost of food go up a lot this last year.  Have you noticed?  Like a block of cream cheese last year was $1.19.  Now, it's over $2.00.  It's like that across the board.  I'm just afraid to spend money because I don't know what is going to happen next.

Currently, my big girls are cleaning out under their beds.  Old toys they have outgrown they are stashing away in a bin I gave them for storage.  From that, I told them to find something special they would like to give to their baby sister.  That way, she gets a surprise - something brand new to her that she has never seen or played with.  The big girls get the joy in sharing something that had been theirs and letting their sister love it.  It's green, recycling at its best and easy on the wallet.

Bah-hum-bug?  I don't think so.


It isn't about how much you spend but the thought behind the gift.  Which got me thinking...about this handmade community.  How cool would it be to barter for gifts - it's a great way to save money.  For instance, if you have a service or an item you've made - to offer it up and make an exchange with someone else for an item.  I love to barter.

It could be ad space on your blog, it could be design services, it could be handmade items...what are your thoughts?  If enough people are interested - I think we could pull this off!

I've opened up a Flickr page where you can post items for trade.  Post your contact info and let the trading begin!  I'll leave this open just for 2 weeks, through November 21st.  Hopefully, in that time, you'll find at least a few items that will ease up your holiday list.

I've posted ad space on my blog - view my listing to see how it works.  I've posted my contact info, exactly what the item is and its value.

Spread the word, share this on your blogs, facebook, etc with your crafty friends.  The more that participate, the more fun it will be.  Grab the button - link to the Flickr page and happy trading!  (and saving!)

{on celebrating life}

There is a time for everything, and a season for everything under the heavens:

A time to be born and a time to die, a time to plant and a time to uproot, a time to kill and a time to heal, a time to tear down and a time to build, a time to weep and a time to laugh, a time to mourn and a time to dance, a time to scatter stones and a time to gather them, a time to embrace and a time to refrain from embracing, a time to search and a time to give up, a time to keep and a time to throw away, a time to throw away and to time to mend, a time to be silent and a time to speak, a time to love and a time to hate, a time for war and a time for peace

This is from the Bible, Ecclesiastes 3: 1-8.

This was recited today, in remembrance for the father of a dear friend of ours who passed away on Sunday. I think about how there are seasons to my life, and I say it aloud often.

This season, its a blessed one.  It's full of delight. It's full of gifts of love, of friendship, of creative joy. And I am thankful.

In every way, on every day, there is a reason and a season for celebrating life.

Thanks be to God.

{sneak peek recap}

Just a quick recap in case you missed it...Here's a quick glance at what you can expect to find at your local quilt shopsbefore the end of the year.  And who won the class seats in my Tie Tote class?  Check that out at the end of this post!

I had 4 seats to giveaway for my new online Tie Tote class...the winners are:

#6 - Rebecca at Our Busy Little Bunch

#9 -  Karen Peachey

#21 - Billie K

#32 - Deana

Thanks for playing along...want to gift someone or yourself with my sewing class?  Just ask me about gift certificates!  (twopeasinapoddesigns@gmail dot com)

{monday mornings inspiration link up}


 I don't like scary things. Not "haunted houses".  Not horror movies.  I'm afraid of heights. I don't like roller coasters or going fast.  (Goofy's Barnstormer at Disney is just my speed) I'm afraid of snakes (although I'm really careful not to tell my girls that because it's a silly fear). I don't believe in ghosts.  Or aliens.  Or robots taking over the world.

But I do love Halloween. Love like it's way better than my birthday, love.

I love the costumes.  I love harvest time.  Pumpkins. The leaves crunching under our feet. I love the games and fun that is Halloween.

And every year, we host a Halloween party. No matter what. This year, Sprout had her first.  She had 2 girlfriends come over for an hour.

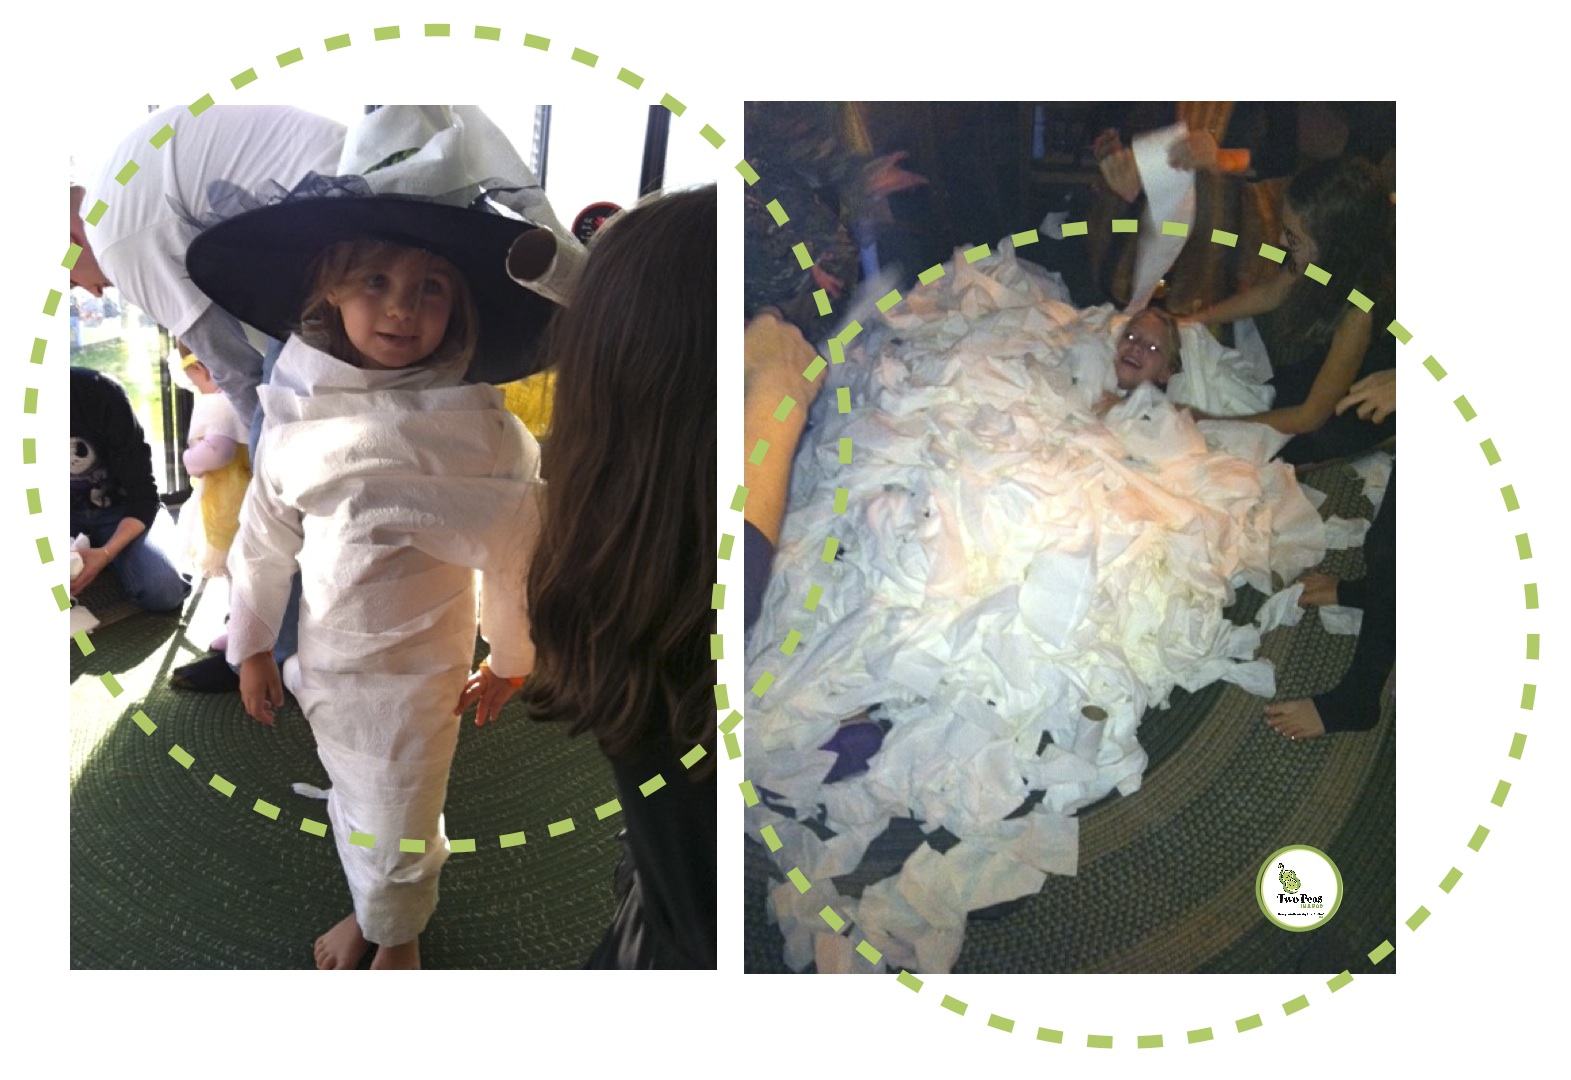
They wrapped each other like mummies.  Then unwrapped each other. They played pass the pumpkin.  Ran around outside.  Chased each other and shared hugs. And then ate Mummies made of chocolate and pretzel rods and cupcakes. (the Gardener could not believe I served store bought cupcakes.  First time ever.  Letting go of the "I have to make EVERYTHING for every party syndrome.  It was quite nice.)

The big girls had their party right after. They beat a bat pinata to death.  It was a tough bat - the Gardener ended up tossing it to each person like a baseball...darn thing would not break open! They ate "worms" from our garden on a bun and had "ghosts". (sliced and boiled hot dogs and baked potatoes with sour cream) They had mummy races.  Which got way out of control when I said "Unwrap your mummies!" I have never in my life seen so much toilet paper lint flying in the air.  It looked like it was snowing. And the big girls also made button bracelets.

Tonight, we trick or treat.  We will drive to our old historic downtown, to the Hardware store, the cupcake shop, and a stop at the coffeehouse for cocoa.   We will visit our mailman's house (he usually has something stashed in his coat pocket, special, for our girls).  And stop at the house where the guy dresses up like Count Dracula and only lets the kids come up one at a time while he ushers them in with his cape.  Scary and fun.  The neighbors all sit outside on the front porch and dress up. And then, we walk to the VFW (Veterans of Foreign Wars) for their Halloween party.  The men hire a magician and have a costume parade.  We go every year.  Last year, the magician levitated a kid.  Serious.  He was amazing!

What inspires me about all of that is the innocent fun, the huge smiles on everyones face, and the laughter that we hear all night as we run and giggle and enjoy the fall evening.

Happy Halloween! What do you have planned for tonight?

Want to link up?  Show us your inspiration, please be sure to include a link back here and grab the linky button too!

{professor peas. if you please}

You're smart.  Busy.  Creative.

You love to read.  Travel.  Listen to music on the go. And you're connected.  And savvy.  And successful.

Meet the teacher, Professor Peas.

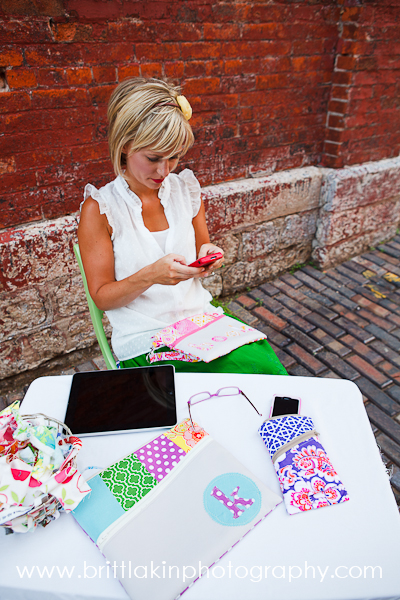
Professor Peas is part of my fall collection of Sprouts Sewing patterns and includes 3 variations. In this pattern you get a travel case for your iPod / iPhone, a case for your e-reader, and a case for your tablet / iPad.

Each case has a double zipper.  One on top for the compartment for your device.  And a second zipper on the front to stash your cords, earbuds, Starbucks card, some lip gloss...just the essentials.

The small size gadget case boasts some adorable ruching. The medium e-reader case includes your letter applique that reads "book", of course. The large size case has a circle applique and letters so that you can personalize it with your initial.

3 sweet little gadget cases.  One smart cookie who sews these up (that's you!) Don't forget to leave an apple for the teacher. Professor Peas Gadget Cases. Class is in session.

{you still have until Oct 29th for a chance at a complimentary seat in your jammies for my newest online sewing class enter HERE.}

{valentino. a new pattern sneak peek.}


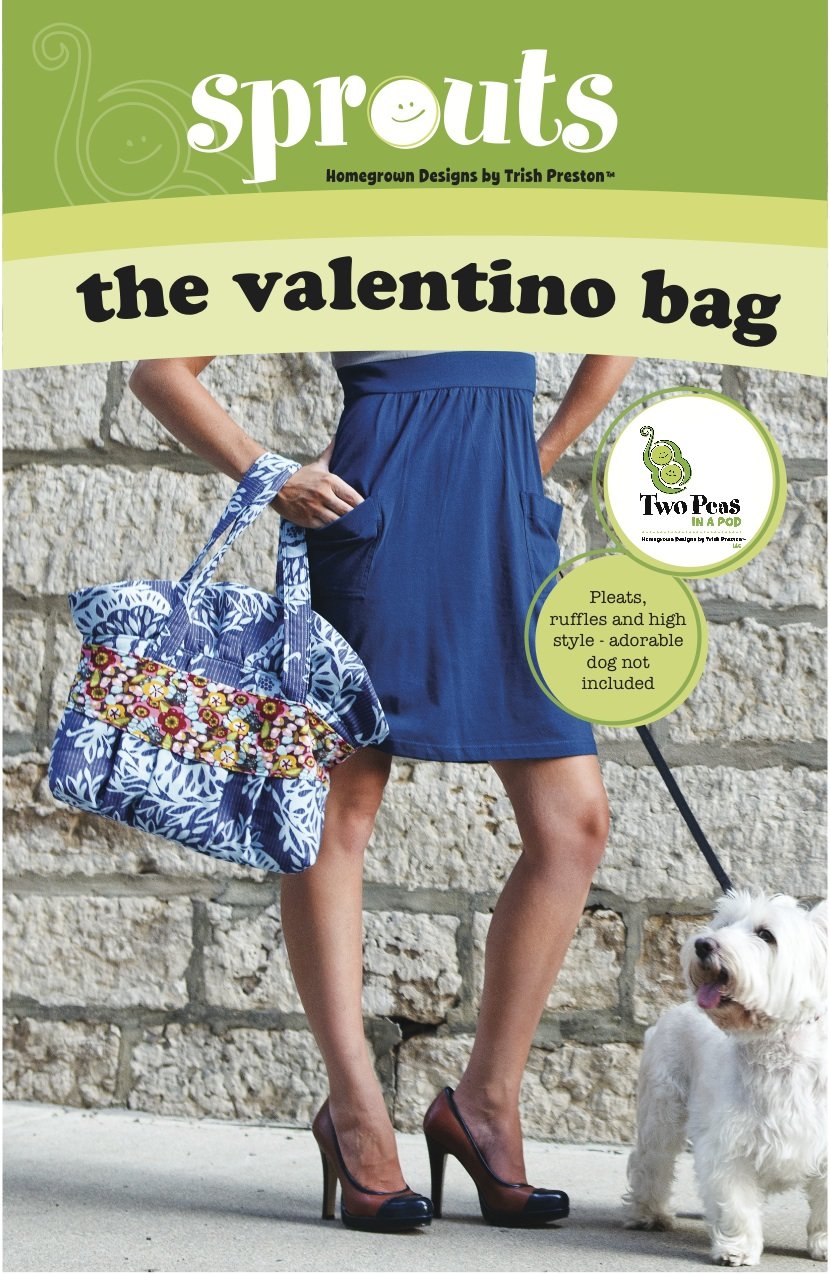
Valentino. Couture.  High Fashion.  Envy. With all this style, doesn't this little bag remind you of a fancy dress walking the red carpet in Hollywood?

This little hottie is a tip of the hat to Valentino, the designer, himself. (and by hottie I mean the bag, but Sarah and Murray are totally hot too!)

 The Valentino boasts gentle pleats along the body and the top. Lots of room inside.  A simple snap closure or if you prefer, a basic zip closure.

Straps that are easy to construct and you can adjust the sizing to make this a shoulder bag or extend the pattern size to wear crossbody. You will be the envy of all with a cute bag like this. And if you had an uber cute Westie by your side like Murray, well, then the world would just be perfect. (he is the cutest thing ever isn't he?!) And of course, who doesn't go walking their adorable dog in their heels? I do it every. day.  (bahaha!  No.  No I don't.  Heck, I don't even have a dog.)

p.s. my giveaway is still open - come sew with me! p.p.s. one more sneak peek - the last of the new pattern releases tomorrow!

What do you think so far?


{date night clutch - new pattern sneak peek}

It's very possible that I dream a lot about date nights. It could be because I have little kids and the reality of a date night...

...ok, there's not much reality to that.  I'm lucky if my husband and I get to finish a single sentence to one another while the kids are awake. But a girl can dream.

My date night dream...a nice hike, someplace with hills and fabulous views. Or  a swing on the hammock while we listen to the birds. Or a nice bike ride in perfect weather. And afterwards, dinner, preferably mexican (I love chips and salsa and avacados...)

I'm pretty easy.  Ok, not like that...I mean low maintenance.

I'd get dressed up for dinner and I would carry this for sure...

But maybe you have other plans for this cute little bag. They would be adorable as gifts for a bridal party. So sweet for a high school dance.

This paper pattern includes directions for 2 different styles.  That nifty grey number on the cover, that's my friends Jan's fabric line, Shades of Grey (and GOTS certified organic cotton - BONUS!).  It has a ruched inset and fancy stitching with a tab snap closure. Or the other version, featuring another friends Honey Child line, (Jennifer's fabric is perfect for this bag), is a little bit simpler construction and includes some suggestions and how - to's for making flower brooches to embellish your bag.

What do you think?  What's your perfect date night look like?

Don't forget to jump in HERE and enter my giveaway for my new online sewing class. Or if you can't wait, find it over there on the sidebar.

Ready for some new pattern sneak peeks? {and a giveaway}

I think you may have already met my newest girl,the Tie Tote.

She's a sweet little gal, easy to make and sassy.  In a good kind of way. This paper pattern comes with her mini-Mommy size too. Because don't all girls want to be just like Mommy? (mine sure do!)

Plus the mini-Mommy size is a great date night size bag so you can borrow it in a pinch. That is if you have date nights, and if you don't, you should... (and that's really a note to myself because I don't have nearly enough with the Gardener)

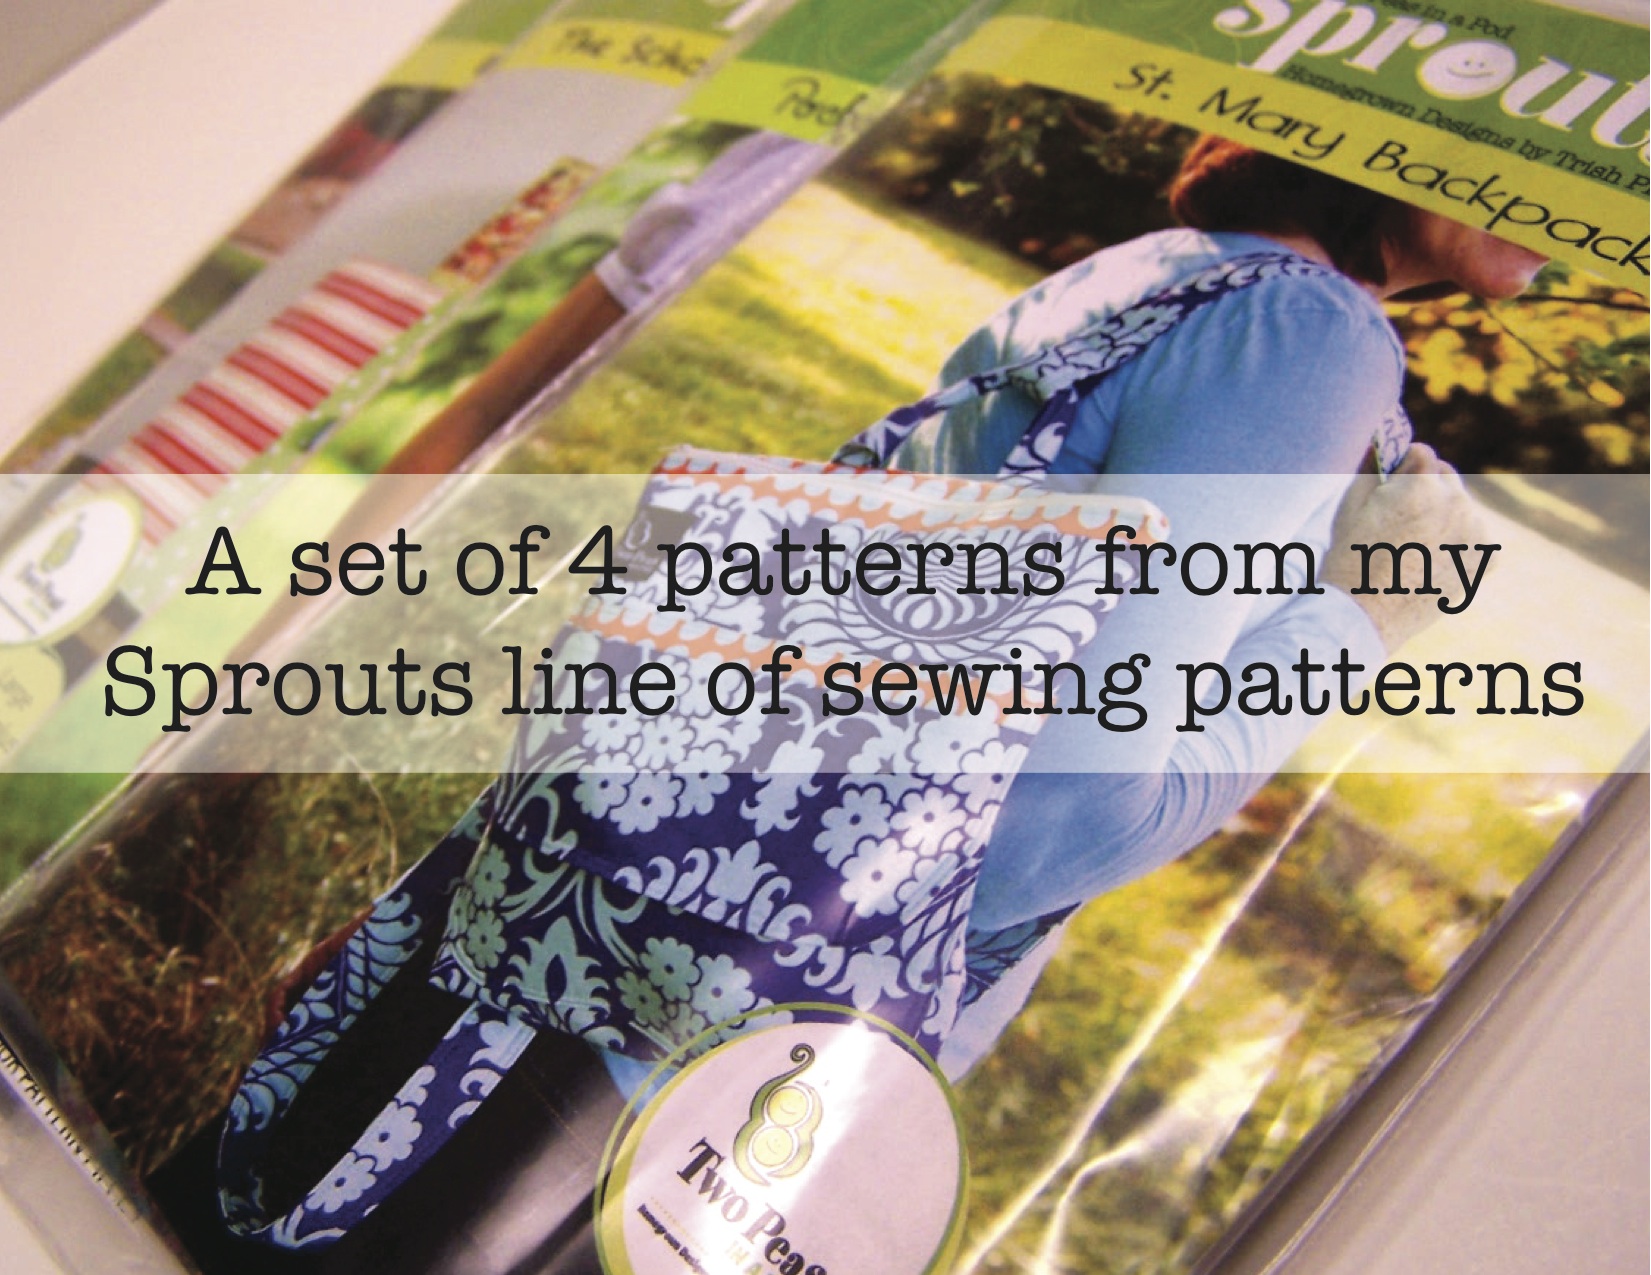
I have 4 new patterns that will be shipping before the end of the year and this is sneaky peek number 1.

This sweet little bag is also the subject of my very first online sewing class.  Sometimes its just hard to get away and attend a class and this is the perfect solution.  Come sew with me - at your own pace - in your jammies - whenever you want.  Through 3 videos, I will guide you through every step to make the Tie Tote.  It's fun, I promise.  And new sewers, YOU CAN DO THIS!  I promise you - you will build confidence with this bag!

To celebrate, these sneaky peeks coming out this week during Quilt Market, I'm doing a little giveaway.  I'm giving away FOUR class registrations for the Tie Tote class!  (Online class does NOT include the paper pattern - that is sold separately but it does have all of the text info you need plus the video support - read the reviews - either way you go, you'll love making this bag!)

I will use random.org to choose a winner.  The giveaway will be open to all, US and International, and will close at midnight EST on October 29th, 2011.

How to enter - Share a comment about some of the things you have on your handmade holiday gift giving list.  I'd love to know what you are crafting up!  Need some ideas, check out a few I have HERE.

For extra entries:

Follow me on Facebook - Leave a separate comment telling me you are a FB fan

Follow me on Twitter - Leave a separate comment telling me you are a follower

Blog about this giveaway - Leave a separate comment with the link

Share this giveaway on Facebook and/or Twitter - "I'm sewing with Two Peas in a Pod Homegrown Designs @trishpreston - come sew with me!  http://twopeasinapoddesigns.com/2011/10/ready-for-some-new-pattern-sneak-peeks/ " - Leave a separate comment telling me you did so

5 possible entries - 4 class registrations to giveaway! And more sneak peeks to come every day this week! {yea!}

{squash pie, yep!}

My husband, the Gardener, as I refer to him, had a pretty hefty harvest this year of butternut squash.  Oh...how he toiled over these vines as they grew.  Bahahaha!  No, really, he didn't.

These were volunteers from our compost bin from winter.  25 volunteers mind you.  TWO - FIVE.  That's a lotta volunteers friends.  What do you do with all that squash?  Make mash of course.

So last week, I cleaned, sliced in half and placed all 25 of these babies on foil lined pans.  Added a bit of water bath to the pan and baked at around 400' for almost an hour.  The skins come right off pretty much and then I mashed them, keeping a few chunks in there.  After it cools, I bag them and freeze them.

My Mother-in-Law, aka the worlds GREATEST pumpkin pie baker (sorry Mom, but it's true - my MIL has you beat by a mile).  She makes REAL squash pies.  Pumpkin or butternut squashes, etc makes no difference.  She adds milk, eggs, sugar, spices and salt and holy toledo - what comes out IS a slice of heaven.  A little chunky but real - real squash pie.  Not from a can.  REAL.  Ya gotta try it!  You'll never go back to the can.

And the rest of the mash - soup.  Did I mention I am awesome at soup making?  I believe I have...I'll say it again.  I rule at the soup thing. Give me a ring - you and I can get together for some squash soup, ok?

(I'll bring back the Monday Mornings Inspiration next week - any ideas where you want to see this go?  I'd love to have more people tooting their horns there!)


{my handmade holiday list}


I am making my list.

My handmade holidays gift making list.  Have you got yours together yet?

You know what happens, every year, without fail, December 10th or so hits and suddenly I am sewing maniac - staying up late - making all kinds of things for teachers and friends and family.

Not this year.  I promise.  I'm going to start early!  (and if you are already done with all your making and it's still October - I don't even wanna know!!  LOL!)

So I have some Two Peas ideas to share with you AND some serious discounts too!  Sale ended Oct 31st

Teachers

  1. How about a patchwork lanyard?
  2. I LOVE LOVE LOVE my Schoolhouse Clutch pattern.  It holds a full size notepad and it's just cute!
  3. These patchwork wristlets are perfect especially with a little gift card from oh, let's say Starbucks, inside!

For Friends and Family
  1. My favorite go to that my sisters and friends love, Sprouts Scarf(lette)
  2. I am making my Mom one of these table runners this year but with a winter theme in blues and neutral colors and the words "let it snow"
  3. The Hazel Hipster and the Mary Beth Messenger are both favorites of my nieces.
And for all your holiday baking...you can't go wrong with this adorable apron for YOU.
I already have some fabulous holiday prints picked out and on my cutting table to make Patsy Ann Apron tops for my girls for our cookie baking this year.  These are quick and SO easy!!  One of my peas even made one herself this summer to wear as a top - but I'm anxious to make them a few Patsy Anns just for Christmas!  AND Extra fun because you can wear it both IN the kitchen and OUT shopping!  Bonus!
So, along with some free tutorial help here - I have pattern discounts to share with you too!   To help you with your handmade gift giving.  One of my non-sewing friends a few years ago bought me a fat quarter bundle, a new pattern and a gift card to a local quilt shop.  Best gift ever!
ALL OF THE PATTERNS in my shop RIGHT NOW are 15% off. AND on top of that, buy any 3 patterns and get a 4th pattern free. Buy 6 patterns, get the 7th and 8th pattern free.  (Limit of 2 free.).
Sale ends October 31st.
(Be sure to mention in the comments your free pattern selection)
There are tons of handmade holiday ideas out there - do you have one to share?  Leave your ideas in the comments section...and get busy on that crafting list so you can be done early and enjoy the holidays!
Linking up with Today's Creative Blog

{monday mornings inspiration - comfort food}

Our weather here in Ohio over this last week has certainly turned Fall like.  Cooler winds, cold evenings, and the leaves are just about gone from the trees.  We have had friends over almost everyday for lunch or dinner and that is just the way I like it.  I love having dinner ready to go so friends can pop in and sit with us and visit.

The other night I was thinking about what I had to get done over the weekend and I thought, you know what?  I don't HAVE to do anything.  I can choose to do nothing all day but cooking and visiting with family and friends and the world will not stop spinning because of it.  It's hard when you run a business especially from home to not to do "something" everyday with the business.  It's not healthy I can tell you that.  But it can be really hard to just let it sit...especially this time of year.  Everybody is prepping for Quilt Market and although we are not going, I do have new products that I need to get into distributors hands to share with shopkeepers who attend Market.

But I have to remind myself, again, all the time, that this will all be in God's time.  I can't worry about "keeping up with the Jones'" and who has what coming out, etc.  I just need to do my own thing, enjoy it.

And in thinking about adhering to some real work hours and REAL time off and spending time with friends, I've been cooking up my famous soups lately.  My friends will tell you - they love my soups.  Yes, I am totally bragging on myself but it's the truth.  I am seriously good at making soup.  They make requests all the time - it's kind of a running joke.  (also a joke, my husband laughed at my photos here - he said, "what?! you're not really going to make the soup for the picture just show ingredients!  I said, "yes" while I chomped on the carrots from the plate.  LOL!)

So, my Monday Morning's Inspiration post today is about good 'ol comfort food, Potato Soup ala Trish style.  I've had more than one friend lately ask me for my recipe which is a little tricky because, um, when I make my soups, I'm just kinda throwing stuff in as I go along.  But, here is my best attempt at sharing my potato soup recipe that my family loves.

Ingredients:

Potatoes - I use a big stock pot and cut up about 12 - 16 potatoes into chunks

Chicken Stock - I'm lazy, I buy a box of organic chicken stock instead of making my own

Carrots, cut in slices (about 3)

Celery (I use sometimes an entire stalk, leaves and all, cut in 1/4" or so slices)

Onions (about 1 medium onion diced)

Salt and Pepper

Hot sauce

Milk

Flour

Butter (at least one whole stick)

Velvetta (yes, the evil velvetta - I do love it in soups)

Parsley - fresh if you have it or use dried

1) Pour in your chicken stock and add some additional water (about 4 cups) and start to boil your potato chunks.

2) Add to that your celery, carrots, and onion.  Let those cook until softened.

3) Use a potato masher and gently mash some of your potatoes while they are in the pot.  This just thickens the soup a bit.  Be sure you leave PLENTY of other potato chunks in your soup.

4) Melt your stick of butter and add some flour.  I usually will do about 3 tablespoons of flour give or take.  Just add one tablespoon of flour at a time and whisk making a little rue.  Then I slowly whisk that mixture into my soup.

5) Add some milk to the pot.  Typically, I add around 1 - 2 cups.  If you still need to fill up your pot, you can add more water.  I have enough veggies and liquid to fill my soup pot 3/4 full at least.  You have to or else you can't enjoy leftovers for lunch for the next week.

6) Add about 1/4 - 1/3 of a block of velvetta or to your taste (or another cheese if you are anti-velvetta).

7) Add a few dashes of hot sauce, pepper, parsley, and a few teaspoons of salt to taste.  I literally measure the salt in my hand and toss it in and keep tasting until I get it right.

8) Simmer for about 45 minutes or so stirring to keep it from sticking on the bottom.

You can sprinkle some cooked bacon over the top, green onions or shredded cheddar cheese.  We usually add some nice bread and a salad to go along with it.  It's delish!

So what have you got cooking lately?  Share a link to your blog so we can be inspired by your latest creations...be sure to link back here and you can use this button too.  I'll be picking one person using Random.org on Wednesday this week from the linky participants to receive a free class with me!  (did you see my first online sewing class was live - over there - on the right sidebar!  Check it out!)


{the peas and their "sheepish" smiles}

I have been busy as a bee...sewing for art shows and preparing the peas for their sheep show in 4H. It's the Guys and Gals Lead and the show consists of the participants wearing outfits made from wool, leading their lambs around the arena, and modeling their outfit for the judges.

Thinking about being "green", we went to thrift store and shopped for wool sweaters that we could refashion.  We found a grey wool skirt and a load of sweaters.

I literally, had no idea what I would do.  I thought I would do some patchwork but honestly, until I put the scissors to everything...it just came as I went along.

I started with the grey skirt.  I cut off roughly 10" or so and added a ruffle hem.  Then, using the excess fabric I made a ruffle and sewed that onto the hem and added more of that ruffle to the green cardigan sweater.  With just a little bit left of that excess fabric, I made a rosette for a belt and also to add to her hat.  ZERO WASTE.  I used up every bit of what I cut off of the skirt.  And since I had no ideas on this skirt and just made it up as I went along - I am SUPER happy with how it turned out.  I wish it fit me.  I may need to pattern this because I just love the fit and flare!

The other outfit I knew I wanted a very full twirly skirt.  I cut patches of cottons and sweaters and pieced them together.  I couldn't put right sides together because the seams turned out REALLY bulky using the sweaters.  So instead, I just overlapped them and zigzagged across the outside to tack the edges down.  I wasn't sure how that would turn out but it worked great and you can't even tell the seams are on the outside.  Plus, the seams all lay so nice and flat - there was really no other way to do it I don't think.

I really wanted these outfits to have a vintage but modern spin and I think we achieved that.  We even found cute vintage wool hats at the thrift store.

Well, the show was last night and the peas had a blast.  We all did.  Ok, maybe not so much Sprout.  It was way past her bedtime AND she was kind of ticked that she wasn't showing.  There was a 3 year old class.  Next year Sprout, we promise!

My green pea showed with little lamb Carly, a tunis, and my little peachy pea showed with little lamb Allie, a suffolk.  Both lambs borrowed from two very sweet families.  The peas were happy to have the Gardener there to talk to some of the other Dads to get the low-down on sheep because they want some of their own asap.  Which means a lot of work and expenses - so we told the girls there has to be much research done before we make any commitments.  Owning livestock is a big responsibility you don't just jump into on a whim.  But the girls are old enough to take it on themselves and so we will just need to thoughtfully consider it .

So how did they do in their show?  Well, they are judged on their ability to control the animal, the animal itself with the majority of points based on the outfit and their modeling.

The peas took 1st and 2nd in their class!  We were so excited but the peas were OVER THE MOON!!  I thought it might be an issue that one beat the other one out but they were ok with that.  And their 4H advisor bought them a milkshake to celebrate.  THAT was heaven for these girls!!

Earlier in the week, one of the peas competed in the Pocket Pets program with her hamster and she took 5th place in that show.  (that's her below in her interview and then with her award).  They have gotten to miss some school, hang out with their friends, watch their friends win (wow!  our club has done awesome!) and eat fair food (oh sweet heaven, steak sandwiches and elephant ears, and rootbeer).  Sprout slept through most of it (note the pink boots - that's all she wears these days.  If I had pink cowgirl boots, it's all I would wear too!)

This was their first year and they have had made the most amazing memories - it's one of those things that as a parent, I know that this week will be something so special to them as they grow.  It's been a great experience for our family.

4H is everywhere!  Rural and Urban and they have tons of projects ranging from robotics to bicycles and sports, health and nutrition...not just livestock and animals.  It's a fantastic program and I HIGHLY recommend you check it out for your kids!

And now...maybe we can get back to a normal schedule somewhat.  Maybe.

{two peas had a little lamb whose fleece was white as snow}

Our county fair is next week.And the girls get an excused absence from school for the entire week to participate in fair.

They are super excited about that.  Except they aren't actually missing the entire week.  Just a couple of days.  Remember THIS from summer?  One of the peas and her sewing 4H project.  Well, the other pea decided to do a pocket pet project so she is showing her hamster at fair.

Yep, a hamster.

No, these are not hamsters.  These are sheep.  (ha!  I know that's pretty obvious but since I said "hamster" and then showed you a picture of a lamb, just to be clear, I've not lost it completely.  Yet.)

And both girls are doing the Guys and Gals lead show.  You get to dress up in a wool outfit, model while leading a lamb.  They were told if they had any hope of ever being the Lamb and Wool Queen someday for our county, they needed to participate in the sheep programs.  They promptly jumped right in.  And no, we don't have sheep.  These girls are borrowed.  Maybe next year.  They are already working on the gardener to either get them 2 lambs OR a cat.  Or at least, this is how they posed the request to him.

Wish us luck!

DON'T FORGET - Catch me LIVE today on Fave Crafts Radio at 3pm EST.  Or listen to the podcast right after the show!

{tie front tote class}

{The class is NOW LIVE!  You can purchase the class over there in the side bar - you'll receive an email within 24 hours that will give you access to the course}

Read a few reviews about this class with:

Hi Trish -

I just wanted to tell you how much I love your video...
Every time I watch the first video I'm amazed at your teaching skills, the music and the lovely environment - I like the sound of the rain in the background.  You make the pattern seem so easy and I like the relaxed way you approach everything.  I'm a bit nervous about making this bag, I've tried a couple and they haven't worked out the way I wanted for various reasons.  Your style in the video suggests that there are different ways to approach things and they're all okay.  You're a supportive instructor.
Just wanted to let you know how much I like your video, I hope this will encourage you to make more classes available!
Thanks!
Sherri

Fat Quarterly E-Zine

Kristen at KD - Quilts,

Aubrey at Mauby's

The voice of quilting - Pat Sloan.

Our Busy Little Bunch

 Stitching by Starlight

Toucan Scraps

Zoe and Drew

Myra at My Blessed Life

I am SO excited to share this with you!!

Back HERE I told you how we were doing this cute little bag as an online sewing course so you could sew along with me on my back porch..

You can join in and sew along with me to make this adorable bag!  I will guide you through start to finish on preparing your materials, cutting your pattern and putting it all together.

The class is made up of 3 videos that will take you through the various steps.  You can watch them all at once or on separate days.  I will have text information up as well to help you along and we can chat in the comment section.

The course costs $20 and you can see over there to the right, you can make your purchase from the front page here.  You will then receive a password so that you can access the class content.

I hope you will love it - we had a lot of fun putting it together and it's super fun to try something new!

Registrations are open now!  See you on the back porch! http://youtu.be/rwMv3p1MXdI