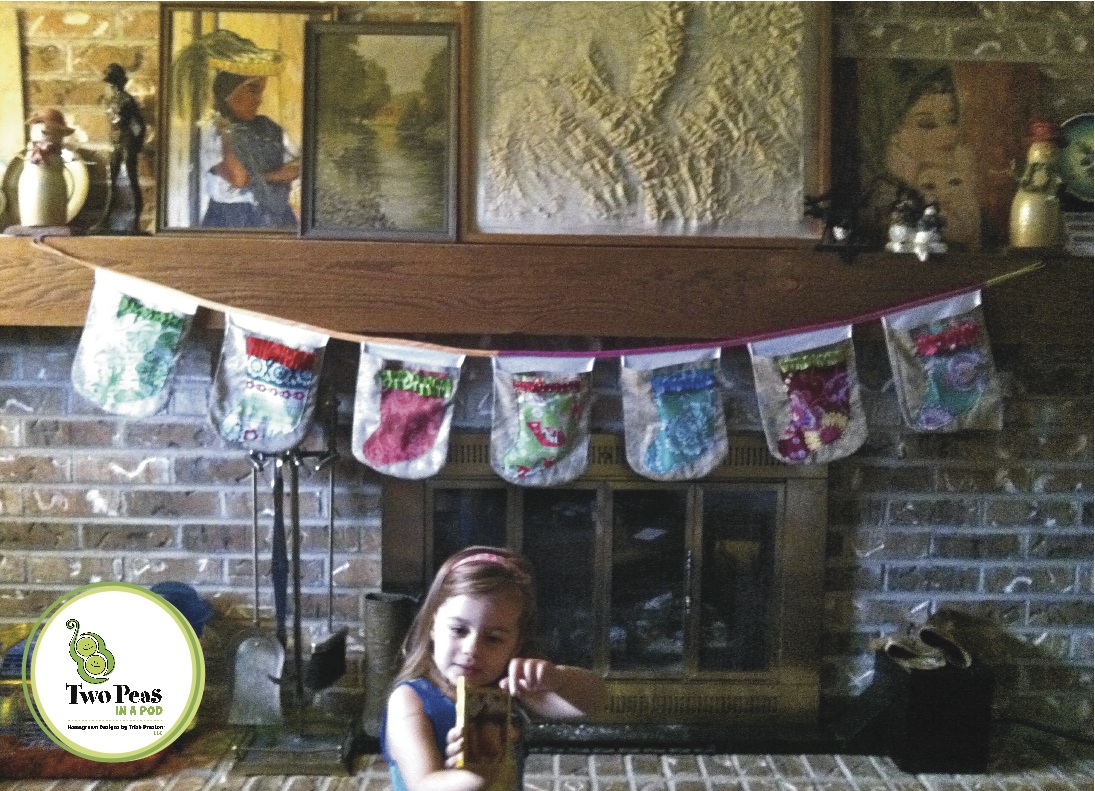
Christmas Stocking Pocket Banner - I wanted to come up with a cute decorative item that we could make into a fun activity with the kids. The idea behind this banner is that the pockets will hold scripture and notes from us to our kids along with something fun like a piece of candy. I made this banner to have 7 pockets - one for each day of the week but you could also make a smaller version that includes one pocket per child and refill each pocket every day. You can fill both the little stocking plus the bigger pocket. Bonus!
 I decided I would have one for each day of the week and fill it a week at a time. I'm hoping their excitement will be contained and they will keep themselves from looking ahead into the next days stocking pocket...I'll let ya know how that goes!
This is a great project for using up some of the larger scraps you have in your stash. You could also use fat quarters but I really try to use what I have on hand and use up odds and ends to save money. I also used on this project a flat sheet that I purchased at a discount store. I used that for the back of the pockets which is a great way to get a lot of bang for your buck. Even a pretty Christmas flannel sheet would work well. Check out your local quilt shops too because I have seen some killer deals on seasonal fabrics! (if you know of any good sales - list the links in the comments section!)
Materials:
A stack of scraps or fat quarters to create your stockings and pockets - the amount depends on how many pockets you are creating. 1/2 yard of lining fabric, 1/2 yard of pocket front fabric is what I roughly used. Plus my scraps for the stockings.
You will also need ribbon or other fabric scraps to create some ruffle embellishments on your stockings. Get creative here! Embellish with ribbon, ric-rac, lace, textured fabric from old clothing scraps like wools, etc.
And you will need bias tape for hanging. I again, used scraps of ready made bias tape I had on hand and patched them together. You can also make your own bias tape but cutting your scrap fabric 2" wide and pressing each long edge in towards the center and then in half again.
1) To start, click on the pattern and print it out. It has been designed to fit perfectly on an 8.5" x 11" sheet of paper. I found that when I went to print this direct from the photo from the blog post, that I needed to increase the size to 125%. You can see that the pockets are the size of a sheet of 8.5" x 11" paper - simply place the corners to the bottom of 8.5" x 11" sheet and cut the corners rounded out as shown on the pattern. Those bottom corner pieces should fit perfectly to the bottom corners of your sheet of paper with 2 1/2" of space between them along the bottom. Make sense? You will need to cut 2 per pocket - a front and a backside of pocket. I used nice fabric for the front and just an inexpensive cotton sheet for my backside of pocket.
2) Cut your stockings out using the pattern - cut them all facing the same way. Your stockings should be about 8 1/2" tall from the longest points.
3) Pick out your embellishments for each stocking.
 4) Next, embellish your stocking. Leave them raw edged (remember, I'm a nap time sewer and frugal - no lining these guys. Leaving them frayed and vintage looking). I used ribbon on all of mine to make it quick and just gathered them by hand and pleated and created ruffles.
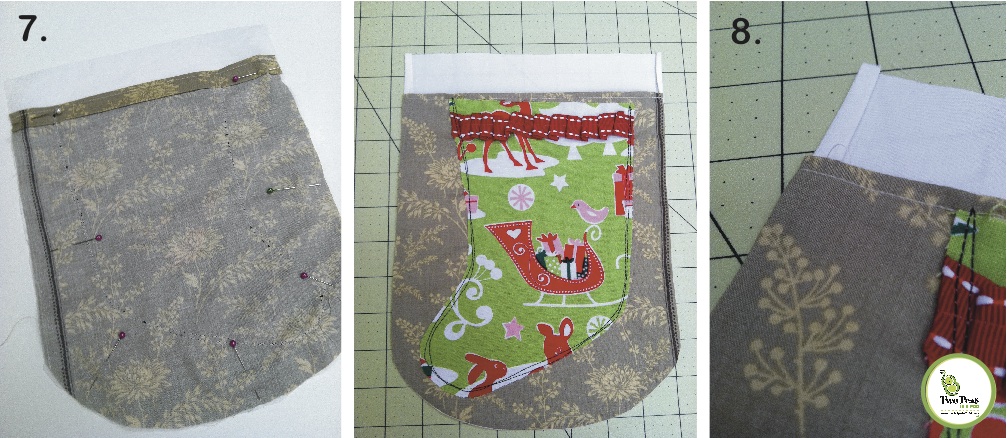
5) Press under the top of your outer pocket 1/4" and then again about 3/4" - 1". Topstitch to hold in place.
6) Pin your stocking on to the front of your pocket. I used black thread and stitched multiple times haphazardly along the edges (DON'T sew across the top - leave it open so you can stash little treats inside.) to attach my stocking. 7) Lay the front of your pocket onto the backside of the pocket with right sides facing, pin and stitch. Clip your corners. Say what? That means all along the edges that are curved, use your scissors and carefully, cut a slit in the fabric but DO NOT cut into the seam. This helps to let the item pull and then lay flat instead of puckering along those curves. Turn your pocket right side out and press your seams.
**NOTE** When I'm piecing something like this together, I use a stitch length of about 2.5. I also will use a fresh universal needle for a project like this. FRESH because each time you sew - you dull your needles. If you wait to change out your needles until they break, chances are you are pulling your fabric and distorting it some by using a dull needle. SO change them out frequently. When I topstitch, such as I did when I attached the stocking to the pocket front, since I was doing multiple lines of stitching and doing what I consider a decorative stitch method, I moved to a stitch length of 3.5.
8. Because our pocket is lower than the backside, it leaves us with a bit of a raw edge showing along the edge on the backside pocket - I simply just tucked it under a bit and gave it a press. When it goes into the bias tape, that will hold it in place.
 9) Last, to finish up our banner, use your bias tape to attach the pockets all together. Leave about 14" at the end for tying it up. Start placing your pocket into the bias tape. Place your pockets 2" apart along the bias tape. Obvious maybe but just to clarify, open up the bias tape and place the pocket in the center (just the backside of your pocket will reach into the bias tape), pin and stitch down the full length of your bias tape.
10) At the end, fold your ends under and stitch to create loops for hanging.
NOW...let's hear your ideas about what to fill them with!! I had planned little notes and small treats but what suggestions do you have?
And if you don't have a mantle to hang this on, this would work perfect along a staircase railing or on the wall. OR you could even sew a much larger version of the stocking onto an old vintage pillowcase and put it on your child's chair at the dinner table - then fill it up and let them find some goodies in there when they go to eat breakfast!

Of course, when I hung this inside on our mantle, Sprout was super excited and wanted to know if Santa was coming TONIGHT. Sadly, no honey. Not tonight but soon. Actually, I was a little leary of her trying to reach into these pockets with them strung from the mantle so for safety sake, I'm hanging this down low and along a wall in our kitchen where the kids can easily get into the pockets and I don't need to worry about somebody pulling the entire mantle from the wall down onto themselves. What? In my house, that would totally happen. Right? Kitchen it is...


